• Welcome to ClassicBroncos! - You are currently viewing the forums as a GUEST. To take advantage of all the site features, please take a moment to register. It's fast, simple and absolutely free. So please join our community today!
    If you have problems registering or can't log into your account, please contact Admin.

LORE Bronco restore

OP
OP
halogrinder

halogrinder

Jr. Member
Joined
Jul 15, 2017
Messages
131
Loc.
Houston
well- intake is back at the machine shop waiting on another pass to be taken off....

20210412_162855-jpg.3116117


Need to sort out the front driveshaft-
It totally won't work with the angle.
I guess I need a "tall" yoke, and CV? IDK. will work on that when I get it all back together.

20210412_165539-jpg.3116118

20210412_165554-jpg.3116119


I threw a new set of shocks on the back of the jeep and couldnt help myself :D

img_20210415_193325_359-jpg.3116120


img_20210415_193325_332-jpg.3116121


Threw a wheel on to make sure we're all good to go in the clearance department.

20210415_135113-jpg.3116122


Messed with the brake setup.
Can't do much with it until i get the body on the truck so I can layout the prop valve and hose layout.
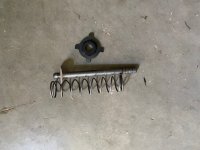
I need to find the pushrod between the booster and master though-

img_20210416_171230_764-jpg.3116123


20210416_175135-jpg.3116124

20210416_175215-jpg.3116125


Worked on the ole' war pig a little too.
Minty flooring covered up with 80 mil deadener, some jute and new vinyl.
Those "preformed vinyl floors" are anything but. I could have done the same with a roll.
my hands hurt from cutting and forming this stuff lol

threw some seat covers on, and found the original build sheet.

20210420_074832-jpg.3116128


20210419_161522-jpg.3116129

20210420_081327-jpg.3116127
 

toddz69

Sponsor/Vendor
Bronco Guru
Joined
Nov 28, 2001
Messages
10,425
I often sell the pushrod/spring/retainers for the hydroboost. Don't think I have any in stock right now but I may soon. Let me know if you still need it.

Todd Z.
 

chrlsful

Bronco Guru
Joined
Oct 21, 2009
Messages
1,427
on board just now.
Saw page one - the core support hasa cut out for the ac housing snorkel's "fresh air tube". Too late to locate it for me? I got the 'grill' off for the 1st time in 38 yrs (itsa '70) and would like to cut it in B4 the thing gets closed up again. Any help appreciated.
 

Rustytruck

Bronco Guru
Joined
Feb 24, 2002
Messages
10,875
looking great. who's headers you using. You must really love your dad great payback. your going to make him cry.
 
OP
OP
halogrinder

halogrinder

Jr. Member
Joined
Jul 15, 2017
Messages
131
Loc.
Houston
They are TBP stainless- but I had to cut the ends off to make them an actual 2.5" header. The ball socket/outpipe is 2 1/4". I think the headers are now the choke point of the engine, with the small primaries. we'll see on the dyno, im sure there are some race headers there we can toss on and see what happens
 

chrlsful

Bronco Guru
Joined
Oct 21, 2009
Messages
1,427
Your core support hasa cut out for the ac housing snorkel's "fresh air tube". Too late to locate it for me? Battery in the way? I would like to cut out mine to match the '73/4 on. Any help appreciated, too much trouble, I'll ask others...
 
Last edited:

chrlsful

Bronco Guru
Joined
Oct 21, 2009
Messages
1,427
thnx for da post-back.
Nah, just 3 points (offa the corners back to an edge) and its over all measurement (rectangle's 2 sides).
I'd like to cut it ina model pre-'73/4 B4 they hada feed all the way back like yours.
I need help locating that hole (got most the parts)while my 'grill' is off.

If U can't reach thats OK too.
 

chrlsful

Bronco Guru
Joined
Oct 21, 2009
Messages
1,427
its just the highest 'hole' on the core support, top passenger's corner.
U show in post #4, 8th pic down, no paint panel.
chrlsful@aol.com if U want

EDIT:
"...take the pic and draw on it..."
sorry, no program here for that.
This is a budget operation~
 
Last edited:

chrlsful

Bronco Guru
Joined
Oct 21, 2009
Messages
1,427
I C one (core support) w/o any paint your in process of tacking in.
'is got that rectangle (rounded corners) 3x6 or so hole top left corner
of the core support, passenger's side. Would B nxt to the stock battery
location. 4 posts is enuff, don't wanna step on your thread. Email below
if continuing discussion~.
"...post #4, 8th pic down, no paint panel (head on shot of the core support)..."
 
OP
OP
halogrinder

halogrinder

Jr. Member
Joined
Jul 15, 2017
Messages
131
Loc.
Houston
Weekend update.
Got this thing back together, been driving it a bit. Came out alright.
4th time's a charm for the intake manifold to get it to fit- back at the machine shop again to get another .040 cut off of it.
The body is getting prepped to be sealed and guide coated before paint.
20210508_143748-jpg.3116373

20210508_143715-jpg.3116374

20210429_111833-jpg.3116375

20210429_111823-jpg.3116376

20210429_111815-jpg.3116377
 
OP
OP
halogrinder

halogrinder

Jr. Member
Joined
Jul 15, 2017
Messages
131
Loc.
Houston
After 5 cuts, I just couldn't get the original intake to work on the engine.
So, I bought a new intake and it dropped right on, no mods needed.
Very strange.
In any case, I still need to make impressions, and port match the intake to the heads- so I'm not able to fully assemble it yet- but I can certainly mock up the electronics and get that sorted out for the dyno.
20210525_111207-jpg.3116759


20210525_120726-jpg.3116758


20210525_133121-jpg.3116757
 
OP
OP
halogrinder

halogrinder

Jr. Member
Joined
Jul 15, 2017
Messages
131
Loc.
Houston
So I've been daily driving the crew cab now for a month or 2, and smelled some gas occasionally....
A peek underneath and I noticed the sump of the midship tank was wet.....I wiped it off and it started POURING out �� the rust was filling the pin hole,that turned into a 3/8" hole once I poked at it.
So, the tank came out.
Bummer- no one makes reproduction tanks, so you have to buy a midship tank for a regular/super cab truck, whack a hole in it, sweat the filler neck and breather out, cap it and move the filler to the back.
Figured now is the time to put a 100psi pump in the tank to an adjustable fuel pressure regulator on the upcoming coyote swap. Also put a new level sensor since it looked like mud inside there lol
Now to assemble, then smoke test it and make sure I have no leaks from my Hellen Keller welds ����


img_20210614_200035_335-jpg.3117220

img_20210614_200035_366-jpg.3117221

img_20210614_200035_390-jpg.3117222

img_20210614_195010_609-jpg.3117223

img_20210614_195010_644-jpg.3117224

img_20210614_195010_686-jpg.3117225

img_20210614_195010_704-jpg.3117226
 
Top