• Just a reminder that you won't be able to start new posts or reply to existings posts in the Archive forum.

    This is where all the old posts go so they can still be used for reference and searched.
  • Welcome to ClassicBroncos! - You are currently viewing the forums as a GUEST. To take advantage of all the site features, please take a moment to register. It's fast, simple and absolutely free. So please join our community today!
    If you have problems registering or can't log into your account, please contact Admin.

Mass Confusion Build. After 2 1/2 years It started!!

dave67fd

Bronco Guru
Joined
Sep 24, 2010
Messages
2,863
Well, I am officially feeling old. Can't bend and stretch the way I used to

Haha, at least you can blame your "aging" on the EB's.

Ditto on Randy's comment. You have to proud of yourself as we have been of you. I only hope i can be half as productive in the next couple of years.
 
OP
OP
71massbronco

71massbronco

Bronco Guru
Joined
Mar 13, 2011
Messages
1,321
Thanks Big Guy.

You will all get a kick out of what a dumba$$ I can be. So my HF welder bites the dust, and I go get another one. Get home and HF has improved the quality of the little 90 amp welders. Better ground clip, better feeder design, and better lid access. So I put on two tack welds then on the third...nothing. Try and try and try. Shut it off thinking thermal protection was on. Nothing. So I drive 20 miles and exchange it for another one. Get the second one set up, do four or five welds, then again.. NOTHING. So now I'm pissed. I change tips, file the ground clamp down so I am sure it's metal on metal ...nothing. Try again, spark, it works! Then nothing, then it works, then nothing nothing then it works. Well, I had been welding with the old welder going on three years, and got used to it being live all the time. I would touch the metal then activate the trigger. The new and improved welder's trigger activates the current....like welders are supposed to do. :-[ I just had to laugh. I am glad I didn't throw a fit at the HF store, not really my style, but man, I feel stupid.
 
OP
OP
71massbronco

71massbronco

Bronco Guru
Joined
Mar 13, 2011
Messages
1,321
stupid is as stupid does LT. Dan ;D

And I "does" alot more then I like to. Further self deprecation story. So, it's time to put the "FORD" letters on the grill. It's laying across my old chassis holder. I get out the tape measure carefully measure, adjust, drill holes and mount the letters. They were perfect....until I realized that the grill was upside down. :eek: It's the fiberglass grill but no biggie, filled the holes with bondo and will redo when my pride heals.
 
OP
OP
71massbronco

71massbronco

Bronco Guru
Joined
Mar 13, 2011
Messages
1,321
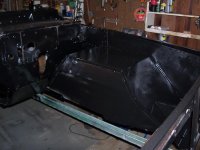
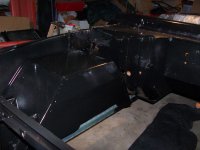
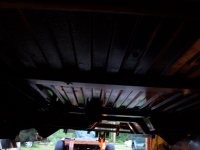
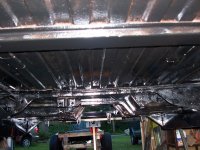
Finished up the welding, and put on an undercoat of Rustx. Turned out OK, missed some spots, had some runs. Took some tuning to get the right paint consistency that the gun liked. Also my lighting in my garage sucks and I painted it black, so I had to go over it again in some spots that didn't get covered.

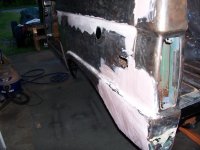
Also put some pink on the truck to get the back quarter panel smoothed out. Will finish the cover up and get some primer on it this week. We'll see.
 

Attachments

  • 102_3094.jpg
    102_3094.jpg
    87.9 KB · Views: 116
  • 102_3095.jpg
    102_3095.jpg
    82.5 KB · Views: 115
  • 102_3092.jpg
    102_3092.jpg
    56.2 KB · Views: 107
  • 102_3093.jpg
    102_3093.jpg
    100.9 KB · Views: 122
  • 102_3091.jpg
    102_3091.jpg
    125.8 KB · Views: 104
OP
OP
71massbronco

71massbronco

Bronco Guru
Joined
Mar 13, 2011
Messages
1,321
Wow, it's been a while, but have been working on the body. I have devoted a lot of time to the rear quarter in the previous post. It is very smooth now. Looks like a lot of bondo but is honestly is probably less then 3 or 4 mm at it's thickest. Still need to work the roll in the quarter but it is getting there.

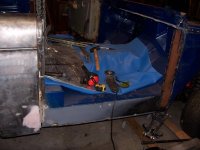
I also painted the front clip and bed with a coat of blue rustx to give it some more protection. Then seam sealed it. Not sure but think I will cover it with a coat of primer and hit it with the body color I am going to paint it.

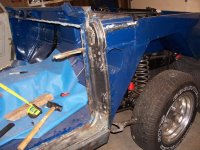
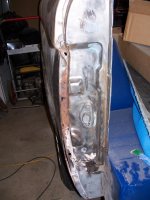
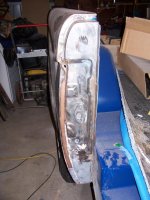
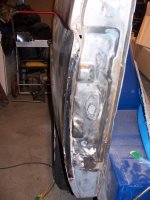
I also wasn't happy with the PS door position. Had to shim it to get it to clear the rocker and since this was all new metal, it became painfully clear that I shorted myself on the placement of the PS door post. It was low about 1/4 inch. So I cut out the welds and relocated it to it's correct position. I also notched the point where the post meets the lower frame so it will have some breathing room. Wasn't looking forward to it, but knew if I wanted to do it right it was a pill I was going to have swallow. Will weld on tomorrow.
 

Attachments

  • 102_3098.jpg
    102_3098.jpg
    128.8 KB · Views: 81
  • 102_3097.jpg
    102_3097.jpg
    105.2 KB · Views: 77
  • 102_3096.jpg
    102_3096.jpg
    86.6 KB · Views: 74
OP
OP
71massbronco

71massbronco

Bronco Guru
Joined
Mar 13, 2011
Messages
1,321
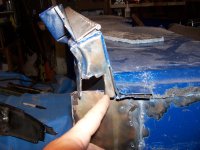
Another fix that I was putting off just because it looked a lot harder than it actually was. The PS striker post and rear outer quarter had developed a rust issue. Most of the metal was good until it rounded the corner and was rusted out. This was due to the copious amounts of bondo from one of the PO's body shop. I cut out the offending piece, cut out a thin cardboard guide and cut the metal piece. It ground out nice and smooth with minimal pinholes.

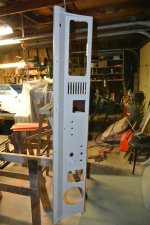
I also attacked the windshield frame. Welded in a new 3/8 nut and gave the bare metal a coat of the blue rustx. Will rivet to the new hinge sometime this week.
 

Attachments

  • 102_3102.jpg
    102_3102.jpg
    101.4 KB · Views: 71
  • 102_3101.jpg
    102_3101.jpg
    108.6 KB · Views: 71
  • 102_3103.jpg
    102_3103.jpg
    102.6 KB · Views: 71
OP
OP
71massbronco

71massbronco

Bronco Guru
Joined
Mar 13, 2011
Messages
1,321
76mabronco stopped by and we went over to some cat's house and he bought a harness for the Turd. It was local to me and the kid lived next door to some really good friends of mine. Small world. Went back to the garage and he schooled me on an extra diff I got with the MC. Glad I asked because I thought is was something completely different.

After he left, started reassembling my pedals under the dash. Also did a quick inventory in the Bronco warehouse (formerly the pool house). Missing some things but not a big deal as, the Bronco 2.0 has what I need. The small missing things like throttle linkage, springs, really add up. I may also cut the windshield frame off the 2.0 as it is in perfect shape. I haven't exactly decided yet. It is slowly becoming the donor vehicle. Plan to get the flawless steering wheel, uncracked dash cover, and am even going to probably use the dash as well. It has some rust issues on the extreme DS. Also cut out my firewall insulation.

Tomorrow I start working out of my companies corporate offices so that means no more "Bronco Breaks" in between video projects. :(

But the most significant part that I will treasure off the other 71 is the magical, elusive and very rare......fuse block cover in pristine condition. It's perfection will make a grown man:cry:
 

Stutsmo

Contributor
Bronco Guru
Joined
Jan 24, 2009
Messages
2,549
Been awhile since I checked in on your build .... your doing a great job on it!
 

76MaBronco

Bronco Guru
Joined
May 21, 2007
Messages
4,219
Loc.
Massachusetts
I tell ya, after seeing the first pics and what I saw when I was there, its like night and day. He's doing a REALLY good job of taking care of business on this build. Excellent job!!
 
OP
OP
71massbronco

71massbronco

Bronco Guru
Joined
Mar 13, 2011
Messages
1,321
I have been chewing away at the 2.0 Bronco and stealing parts and have decide that I am going to take the windshield frame off after inspecting it. It is near perfect. Even the wiper motor looked like it came out of the box. Wish the rest of the truck was in such good condition. Also am removing the dash and going to integrate it as well. It's in rough shape on the drivers side, but better then my original.
 

Attachments

  • DSC_1236[1].jpg
    DSC_1236[1].jpg
    144.4 KB · Views: 53
  • DSC_1232[1].jpg
    DSC_1232[1].jpg
    55.1 KB · Views: 52
  • DSC_1229[1].jpg
    DSC_1229[1].jpg
    54.1 KB · Views: 50
  • NMS_1228[1].jpg
    NMS_1228[1].jpg
    108 KB · Views: 54

dave67fd

Bronco Guru
Joined
Sep 24, 2010
Messages
2,863
D,
Nice to see your still staying "Bronco" busy. Haven't been around too much lately, work has been killing me.
 
OP
OP
71massbronco

71massbronco

Bronco Guru
Joined
Mar 13, 2011
Messages
1,321
It's obvious I am not going to make the BYOB fall cruise.:(

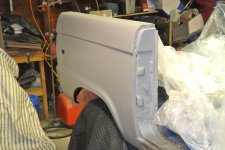
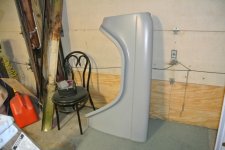
But I am still at it. I installed the wiring harness and got it mostly hooked up. Also wanted to shoot some primer before it got too cold. Only had time to do the quarter panel, dash, and front fender.

I went ahead and decided to pull the dash from the red 71. It had some rust issues on the drivers side, but I grinded that out and smoothed it with a little bondo. Good as new. Think I am going to go back to my metal grill as the glass just isn't doing it for me. More work. Yeah. On the plus side, I got to test out the new gun and tune it in. Was pretty happy with the result. I need to do some more shooting before it gets too much cooler. I should have it ready to plow the drive this winter.
 

Attachments

  • dash.jpg
    dash.jpg
    83.3 KB · Views: 42
  • quarter.jpg
    quarter.jpg
    69.8 KB · Views: 50
  • fender.jpg
    fender.jpg
    62.4 KB · Views: 38
OP
OP
71massbronco

71massbronco

Bronco Guru
Joined
Mar 13, 2011
Messages
1,321
No. (Sigh) My son has an important Boy Scout fundraiser on Saturday morning for a food pantry.
 

tasker

Contributor
all knowing of nothing
Joined
Jun 2, 2006
Messages
20,847
Loc.
NH
bring him along....Bones members have deep pockets for charity!
 
OP
OP
71massbronco

71massbronco

Bronco Guru
Joined
Mar 13, 2011
Messages
1,321
Wish I could. He has to be there for this one, unfortunately. I will be thinking about you all enjoying the beautiful New England fall. Calm before the storm. :)
 
OP
OP
71massbronco

71massbronco

Bronco Guru
Joined
Mar 13, 2011
Messages
1,321
Ok, back to the build.

I put the fan shroud on yesterday and got all the clamps on. The shroud screws were so rusted into the assembly, I just drilled right through the top ones and put new bolts on them. I still have to take care of the throttle linkage and few other details.

Got the grill on deck and finished prepping it. I am going back to the steel grill. Also primed the other fender and the windshield frame as well as the steel grill.

The Bronco is now almost all the same color for the first time since I bought it. Yea.
 

Attachments

  • DSC_1257[1].jpg
    DSC_1257[1].jpg
    100.1 KB · Views: 82
  • DSC_1258[1].jpg
    DSC_1258[1].jpg
    75.6 KB · Views: 74
  • DSC_1256[1].jpg
    DSC_1256[1].jpg
    78.1 KB · Views: 75
  • DSC_1250[1].jpg
    DSC_1250[1].jpg
    81.5 KB · Views: 78
  • DSC_1245[1].jpg
    DSC_1245[1].jpg
    88.4 KB · Views: 75
  • DSC_1254[1].jpg
    DSC_1254[1].jpg
    90.8 KB · Views: 76
  • DSC_1247[1].jpg
    DSC_1247[1].jpg
    126.5 KB · Views: 93

tasker

Contributor
all knowing of nothing
Joined
Jun 2, 2006
Messages
20,847
Loc.
NH
let me know if you don't have plans for the glass grille....
 
Top