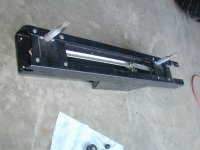
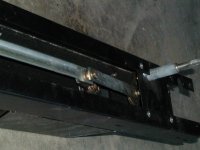
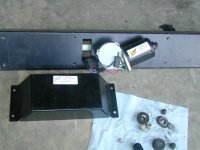
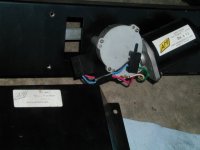
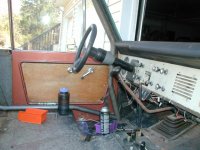
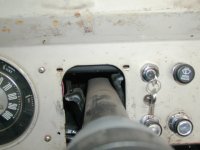
What does that wiper motor and linkage look like underneath the cover


Community
Message Forum
Photo Gallery
Event Calendar
Book Reviews
Bronco Wallpaper
Bronco FAQ
Link Back to CB!
Photo Gallery
Event Calendar
Book Reviews
Bronco Wallpaper
Bronco FAQ
Link Back to CB!

Buy / Sell


Bronco Tech
3 Arm Wiper Setup
Fix Motor Mount
Roll Cage Braces
Throttle Body 65mm
Wheel Alignment
Heat Riser Replacement
Vent Window Repair
Center Console Mount
Straighten Bumper
Ford 6R80 6 spd
More Tech...
Fix Motor Mount
Roll Cage Braces
Throttle Body 65mm
Wheel Alignment
Heat Riser Replacement
Vent Window Repair
Center Console Mount
Straighten Bumper
Ford 6R80 6 spd
More Tech...

Install the app
-
Welcome to ClassicBroncos! - You are currently viewing the forums as a GUEST. To take advantage of all the site features, please take a moment to register. It's fast, simple and absolutely free. So please join our community today!If you have problems registering or can't log into your account, please contact Admin.
You are using an out of date browser. It may not display this or other websites correctly.
You should upgrade or use an alternative browser.
You should upgrade or use an alternative browser.
Ms Piggy- Cummins 4BT Bronco with a slight weight issue!
- Thread starter broncosbybart
- Start date
broncojo
Jr. Member
First time I checked your thread, I didn't like the bend behind the drivers area at first but now that you have the front and rear bar installed it looks great. I did the removable front on mine also here's a pic that might give you some ideas on how you may want to do yours.


Here is a thread on the removable front end also.
http://classicbroncos.com/tech/bolt-on-front-inner-clip
I hope to build my own roll cage also, and yours looks great I'll be keeping an eye on this one. Keep up the good work and pictures. Thanks
Here is a thread on the removable front end also.
http://classicbroncos.com/tech/bolt-on-front-inner-clip
I hope to build my own roll cage also, and yours looks great I'll be keeping an eye on this one. Keep up the good work and pictures. Thanks
OP
OP
broncosbybart
Bronco Guru
- Joined
- Mar 13, 2002
- Messages
- 2,644
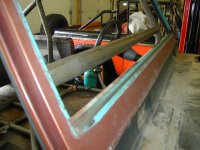
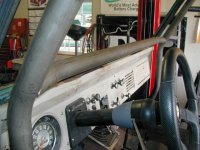
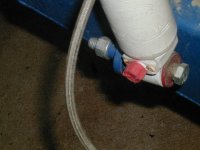
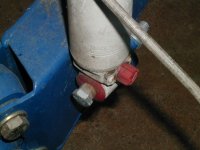
Here are a couple of pics of the winshield wiper assy. Let me know if need to see more on it.
Thank you for the link on the inner fender article. I didn't even know one was out there. Saves me from typing it all out and gives me a few good ideas.
Thank you for the link on the inner fender article. I didn't even know one was out there. Saves me from typing it all out and gives me a few good ideas.
Attachments
OP
OP
broncosbybart
Bronco Guru
- Joined
- Mar 13, 2002
- Messages
- 2,644
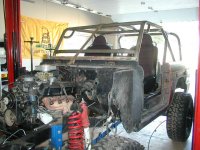
Did some more work on it today. No real wrenching, just some cutting, fitting, and tack welding.
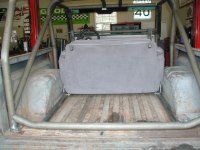
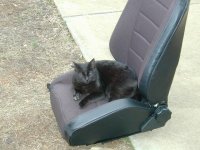
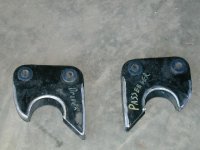
Plans are to use a fold and tumble rear seat. I began making some support brackets for the forward mounting locations. There are 2 of these brackets, 1 left and 1 right. They are mirror copies of each other and I cut these out of some angle laying around. The large holes are 5/8" and the bottom holes are 5/16". These brackets will bolt to the roll cage support structure, making the seat entirely removable if need ever arises.
The 5/8" hole is a little big for the post in the Jeep TJ seat, but the original TJ seat brackets have a little plastic bushing that I'm going to remove and use in these brackets to keep it all quiet. The posts on the TJ seats are actually 1/2" diameter.
Attachments
![35[1].JPG](/forums/data/attachments/300/300066-1737ef32e3e74839083bf827d5eb1fef.jpg)
![333[2].JPG](/forums/data/attachments/300/300065-47bba81f620e047dc6d52164e686d7f2.jpg)
![32[1].JPG](/forums/data/attachments/300/300059-541ee689a286ddb76767b87e30bd8299.jpg)
OP
OP
broncosbybart
Bronco Guru
- Joined
- Mar 13, 2002
- Messages
- 2,644
Well, the seat brackets might not be very exciting but they sure took a while to make, so there they are. I still have to make the rear mounting brackets for the rear seat. I got sick of that though so I worked on the front seat mounting setup. Isn't ADD a wonderful thing? I can jump around from thing to thing and always have something to do because I never get anything done!
The front seat mount tube is all 1.75" .120 wall DOM as I didn't want to run 2" stuff here. If I had any 1.5" DOM, I would have used that. The seats are really tall and keeping the overall installed height reasonable is kind of challenging. Guess there are no good pics of the tube work yet. Sorry.
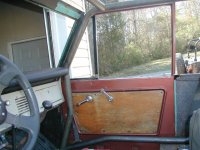
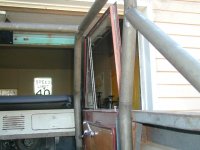
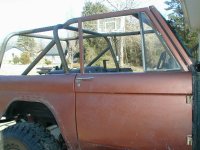
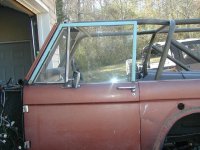
Here are a few pics of the bling bling door hinges and a test fit of the doors. I was sure to measure everything before I bent all the tube. Lo and behold- the doors fit with no issue! All the tubing clearances are great and the angles and fit look spot on. Enjoy!
The front seat mount tube is all 1.75" .120 wall DOM as I didn't want to run 2" stuff here. If I had any 1.5" DOM, I would have used that. The seats are really tall and keeping the overall installed height reasonable is kind of challenging. Guess there are no good pics of the tube work yet. Sorry.
Here are a few pics of the bling bling door hinges and a test fit of the doors. I was sure to measure everything before I bent all the tube. Lo and behold- the doors fit with no issue! All the tubing clearances are great and the angles and fit look spot on. Enjoy!
Attachments
OP
OP
broncosbybart
Bronco Guru
- Joined
- Mar 13, 2002
- Messages
- 2,644
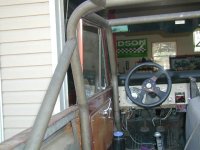
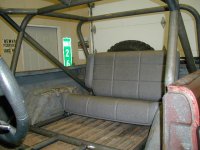
Here are some of the driver's side. Bronco doors aren't very light and getting them into place without help can be fun.
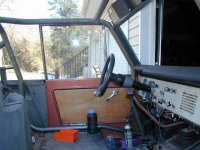
On the interior pics, you can kinda see the beginnings of the seat structure for the front seats.
On the interior pics, you can kinda see the beginnings of the seat structure for the front seats.
Attachments
OP
OP
broncosbybart
Bronco Guru
- Joined
- Mar 13, 2002
- Messages
- 2,644
Thank you!
Ha, nice. I change up the title regularly, so now people are wondering what you are referring to. It was 'backseat lovin' with the previous posts
Ha, nice. I change up the title regularly, so now people are wondering what you are referring to. It was 'backseat lovin' with the previous posts
OP
OP
broncosbybart
Bronco Guru
- Joined
- Mar 13, 2002
- Messages
- 2,644
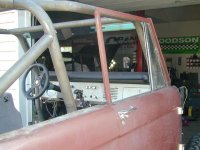
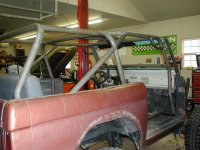
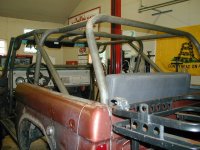
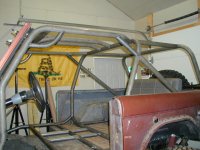
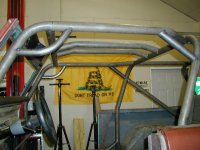
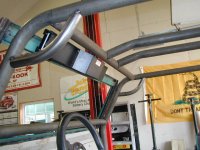
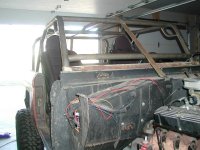
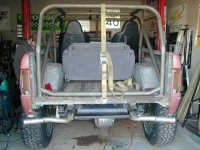
Got some more work done on the roll cage. It is about finished. Went and added some bars. As well, the seat framework is done. Tube was bent for the overhead bars and dash bar. The rear seat mounting brackets are positioned as well. Right now it is all tacked in place, but not finish welded. The front seats will need to have some more tube run for seatbelt mounting points for the shoulder harnesses. Not exactly sure on what to do there. I'd like to keep the area between the front and rear 'compartments' somewhat accessible. Still pondering on what to do but will think of something.
Oh, and I gave her a name. Ms Piggy! Clay came over for a bit and helped out. We moved a fair bit of stuff around and all of it was HEAVY! I don't think there is one light part on the whole truck.
Thanks for the help Clay!
Oh, and I gave her a name. Ms Piggy! Clay came over for a bit and helped out. We moved a fair bit of stuff around and all of it was HEAVY! I don't think there is one light part on the whole truck.
Thanks for the help Clay!
Attachments
-
 P1010009.JPG65.6 KB · Views: 91
 -
![P1010007[2].JPG](/forums/data/attachments/304/304413-2b310fc491c3e65ddb4c9acfe549b713.jpg) P1010007[2].JPG64.2 KB · Views: 94
P1010007[2].JPG64.2 KB · Views: 94 -
 P1010007.JPG63.8 KB · Views: 96
 -
 P1010006.JPG64.8 KB · Views: 89
 -
 P1010005.JPG64 KB · Views: 98
 -
 P1010004.JPG62.8 KB · Views: 100
 -
 P1010002.JPG68.6 KB · Views: 106
 -
 P1010001.JPG62.5 KB · Views: 95
 -
 P1010010.JPG60.8 KB · Views: 88
 -
 P1010011.JPG64.1 KB · Views: 88
 -
 P1010012.JPG64.1 KB · Views: 99
 -
 P1010013.JPG68.4 KB · Views: 96
lil bronco
Jr. Member
- Joined
- Jul 4, 2011
- Messages
- 348
Man that thang is looking outstanding
broncojo
Jr. Member
That cage is looking awesome, great work.
OP
OP
broncosbybart
Bronco Guru
- Joined
- Mar 13, 2002
- Messages
- 2,644
OP
OP
broncosbybart
Bronco Guru
- Joined
- Mar 13, 2002
- Messages
- 2,644
OP
OP
broncosbybart
Bronco Guru
- Joined
- Mar 13, 2002
- Messages
- 2,644
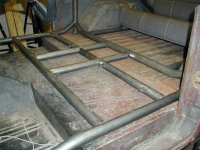
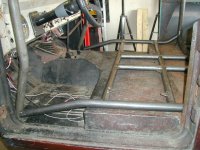
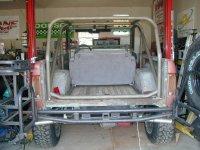
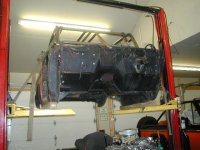
Removed the tailgate, windsheld frame, and all the hardware attaching the body to the frame. We ran a big strap from the cowl to the tailgate area to keep the body from flexing. Having the roll cage being bolted to the tub will do most of the work for keeping things in place.
Attachments
OP
OP
broncosbybart
Bronco Guru
- Joined
- Mar 13, 2002
- Messages
- 2,644
welcome anytime for the
OP
OP
broncosbybart
Bronco Guru
- Joined
- Mar 13, 2002
- Messages
- 2,644
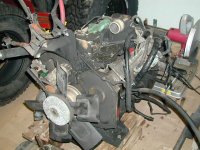
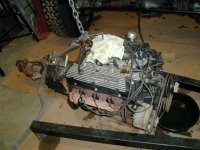
The engine is out!
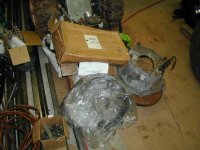
Time to gather parts from all over the premises. Stuff is here, there, and everywhere...
Got a fair bit of it piled up now. Some I might use, some I might not.
A partial list entails the new to me 4BTAA in the garage now. It is a 2001 year model and is the P-pump model. Who knows if that is really needed for this beast, but it can't hurt. The P-pump is supposed to be the best for fuel delivery for high performance tweaking. Heck, it might just stay very close to stock. Time will tell.
As well, there is a Dodge NV-4500 trans sitting there, the Atlas 4 speed transfer case, a 14 bolt rear axle, a Detroit for the 14 bolt, a HE351 turbo (not sure if I'll use it yet or not), suspension parts, steering gear, and more.
Attachments

OP
OP
broncosbybart
Bronco Guru
- Joined
- Mar 13, 2002
- Messages
- 2,644
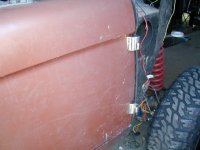
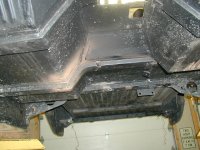
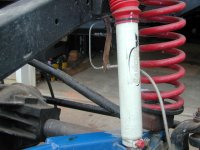
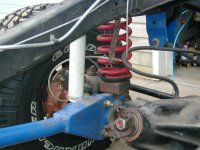
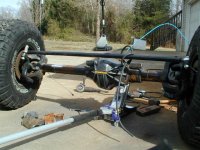
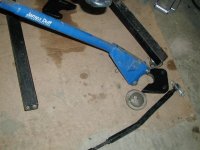
The front axle installation needed a bunch of help. The front shocks were installed wrong. The front brake hose brackets were welded to the frame. The fabbed up front spring 'lift pucks' are going away. The biggest thing is the caster is -1 degrees!!!
Attachments

Last edited:
OP
OP
broncosbybart
Bronco Guru
- Joined
- Mar 13, 2002
- Messages
- 2,644
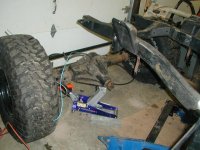
The front axle is out!
Plans are to use the Cage/Bloody Knuckle D60 weld on brackets and remove the weld on wedges that someone installed on the axle. Judging by the welds, the wedges were not Dynatrac items.
With a fair amount of cutting and grinding, the wedges are off!
Got the bushings installed in the weld on brackets and did some grinding on them to get them ready to install.
Attachments
OP
OP
broncosbybart
Bronco Guru
- Joined
- Mar 13, 2002
- Messages
- 2,644
Been slack on the updates.
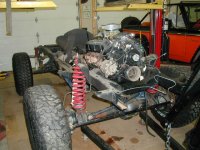
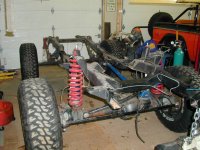
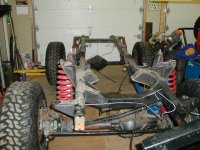
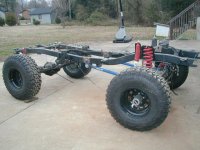
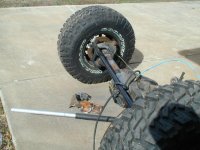
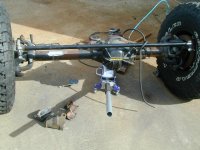
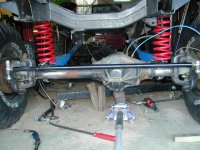
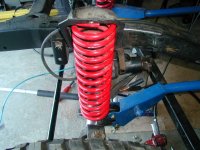
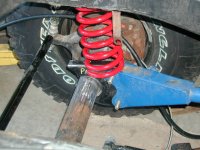
Got some more work done on it. The front end is heavy! Got it set into place for now and tacked the new radius arm brackets on. Right now, it has 8 degrees of caster and still has a good pinion angle. Being a high pinion axle helps as well, but I'm sure it is going to create problems with the large oil pan on the 4BT. That is down the road though. I don't plan to burn any welds in until I know all the pieces of this jigsaw puzzle fit together.
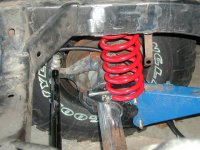
The new coil springs are 4.5" WH rock crawler coils. I'm thinking with the weight of this thing, they will compress more than enough. Might even need 5.5" coils, or a F250 coil or something. For now, they're just sitting on the radius arm brackets. I plan to fab up some lower coil buckets, and yes, the frame mounted brake brackets will be relocated to the front axle like they should be.
Got some more work done on it. The front end is heavy! Got it set into place for now and tacked the new radius arm brackets on. Right now, it has 8 degrees of caster and still has a good pinion angle. Being a high pinion axle helps as well, but I'm sure it is going to create problems with the large oil pan on the 4BT. That is down the road though. I don't plan to burn any welds in until I know all the pieces of this jigsaw puzzle fit together.
The new coil springs are 4.5" WH rock crawler coils. I'm thinking with the weight of this thing, they will compress more than enough. Might even need 5.5" coils, or a F250 coil or something. For now, they're just sitting on the radius arm brackets. I plan to fab up some lower coil buckets, and yes, the frame mounted brake brackets will be relocated to the front axle like they should be.
Attachments

Similar threads
- Replies
- 5
- Views
- 239
City: Willard, NC
Price: $56000
- Replies
- 7
- Views
- 3K
- Locked
City: Grafton
Price: $15000
- Replies
- 1
- Views
- 2K