• Just a reminder that you won't be able to start new posts or reply to existings posts in the Archive forum.

    This is where all the old posts go so they can still be used for reference and searched.
  • Welcome to ClassicBroncos! - You are currently viewing the forums as a GUEST. To take advantage of all the site features, please take a moment to register. It's fast, simple and absolutely free. So please join our community today!
    If you have problems registering or can't log into your account, please contact Admin.

Ms Piggy- Cummins 4BT Bronco with a slight weight issue!

sprdv1

Contributor
REBEL
Joined
Mar 8, 2007
Messages
81,964
Looking good brother.. I know you can't wait to be done
 
OP
OP
broncosbybart

broncosbybart

Bronco Guru
Joined
Mar 13, 2002
Messages
2,644
Thanks guys. I really can't wait to get it done, but progress is VERY slow. Between work and life, there isn't much left for free time.

I did fab up some lower coil buckets and thought I'd post them up here. The band saw and plasma cutter make the project a lot easier.

Here are some pics of the process and some weldz.

They're not done yet. I still have to make some tabs for the spring retainers and drill holes to mount them to the radius arm brackets, but you get the idea.
 

Attachments

  • 20.JPG
    20.JPG
    67 KB · Views: 88
  • 22.JPG
    22.JPG
    69.7 KB · Views: 85
  • 23.JPG
    23.JPG
    64.5 KB · Views: 95
  • 24.JPG
    24.JPG
    71.2 KB · Views: 88
  • 27.JPG
    27.JPG
    63.4 KB · Views: 90

BRONCROB

Bronco Guru
Joined
Nov 24, 2010
Messages
1,613
Loc.
WISNER LA.
Nice welds.How are you going to make them fit the curved radius arm mounts?I've been thinking about making me some to tilt my springs back a bit.
 
OP
OP
broncosbybart

broncosbybart

Bronco Guru
Joined
Mar 13, 2002
Messages
2,644
Thanks! On this one, I'm using the weld on D-60 brackets. The top of the brackets are flat. That said, I've built a pair of these before for my race rig and bolted them down to the stock radius arm mounts. Works fine with no issues. Basically I'm copying the mounts made by the parts vendors with scrap I've got laying around the house.
 
OP
OP
broncosbybart

broncosbybart

Bronco Guru
Joined
Mar 13, 2002
Messages
2,644
Time for a long awaited update!

Got some more work done on the front end. The front spring buckets are located and tacked on the radius arm brackets. I will drill the coil buckets and use bolts when I'm sure of the locations.

Also worked on the lower track bar mount, using a WH track bar riser. I made a box bracket out of 1/4" wall 2x4 to give the bracket additional support to rest against.

Then, fun and games drilling the provided bolt for the cotter pin. Always a good time.

Now, the track bar is parallel with the drag link, albeit a lot shorter than the drag link is. Still pondering on trying to do an extended track bar that runs to the inner C on the axle housing.
 

Attachments

  • 35.JPG
    35.JPG
    58.8 KB · Views: 116
  • 34.JPG
    34.JPG
    68.1 KB · Views: 131
  • 33.JPG
    33.JPG
    65.1 KB · Views: 129
  • 30.JPG
    30.JPG
    60.3 KB · Views: 118
  • 29.JPG
    29.JPG
    69.1 KB · Views: 139
  • 32.JPG
    32.JPG
    61.1 KB · Views: 126
OP
OP
broncosbybart

broncosbybart

Bronco Guru
Joined
Mar 13, 2002
Messages
2,644
Got some work done on the 14 bolt rear axle. Clay and I pulled the axle I'm using a while back from a late 90's Suburban or something at the pull-a-part. All I remember is it was about 90 degrees in the shade (ie- under the vehicle). Far cry from where it is right now. This axle is metric and there are some differences between it and the earlier years, though I'm not sure what all those differences are.

For sure one is the lock rings on the rear hubs. This design uses a circlip and key to hold the retaining nut in place. Had to use a magnet to get the key out of the keyway. The retaining nut is some funky 6 pinned thing that I don't have a tool for. A punch and hammer knocked it loose though. From what I understand, they can be replaced with the standard D60 lock rings with the 4 tabs and I'll get those for sure. No sense in messing with these things..

To get to the hub retainers, 8 bolts hold the axle flange onto the hubs. With those removed, the axles slide right out. I'm digging the full floating idea for sure!
 

Attachments

  • 7.JPG
    7.JPG
    62.4 KB · Views: 53
  • 6.JPG
    6.JPG
    65.7 KB · Views: 50
  • 5.JPG
    5.JPG
    65 KB · Views: 51
  • 4.JPG
    4.JPG
    66.3 KB · Views: 49
  • 3.JPG
    3.JPG
    63.8 KB · Views: 51
  • 2.JPG
    2.JPG
    61.6 KB · Views: 48
  • 1.JPG
    1.JPG
    63.9 KB · Views: 45
OP
OP
broncosbybart

broncosbybart

Bronco Guru
Joined
Mar 13, 2002
Messages
2,644
Then, it was to the work bench to remove the bearings from the hubs. According to Bill's 14 bolt bible on pirate, bearings are supposed to come right out. He must have been using a bigger hammer.. The oil seal and then the inside one must be removed first to access a 'snap ring' that holds the outer one in place.

Snap ring is in parenthesis because it isn't a true snap ring and it was a complete female dog to remove. After a lot of testing my patience and having to use a big pair of snap ring pliers, small screw drivers, and fingers and toes, it finally came out. This was typical of both sides. It isn't something I'd want to do in the woods...

All that done, the hubs are now bare.

Yes, the rears are 8 lug and my fronts are 5 lug. Got something I'm pondering on with fixing that situation. Waiting on the key player in that plan though.

That snap ring really isn't cool.
 

Attachments

  • 15.JPG
    15.JPG
    66.1 KB · Views: 43
  • 8.JPG
    8.JPG
    70.7 KB · Views: 40
  • 13.JPG
    13.JPG
    69.8 KB · Views: 41
  • 12.JPG
    12.JPG
    72 KB · Views: 46
  • 10.JPG
    10.JPG
    62 KB · Views: 46
  • 9.JPG
    9.JPG
    68.3 KB · Views: 45
OP
OP
broncosbybart

broncosbybart

Bronco Guru
Joined
Mar 13, 2002
Messages
2,644
Here are a few pics of the 'lip' on the bottom of the housing. I have no idea why they made it so big. Yes, the axle is upside down on the roll dolly in the pics.

The 13 bolt diff cover is from Brad at Barnes 4WD. It is a NICE piece!
 

Attachments

  • 16.JPG
    16.JPG
    63.9 KB · Views: 58
  • 19.JPG
    19.JPG
    69.7 KB · Views: 61
  • 18.JPG
    18.JPG
    63.5 KB · Views: 57
  • 17.JPG
    17.JPG
    64.1 KB · Views: 63
OP
OP
broncosbybart

broncosbybart

Bronco Guru
Joined
Mar 13, 2002
Messages
2,644
Next order of business was to remove the carrier. Why? Because this axle weighs a ton and I can't move it! Saw somewhere that the axles weigh in at 550 lbs!!! Far cry from a 9".

So, I measured the back lash and marked the caps with a center punch, so I would know how to reassemble it. Then I removed the carrier from the housing. The way the GM 14 bolt is built, it is very similar to a 9" rear axle. It has preload cups for the carrier and a removable pinion support on the front, just like a 9". I like that a lot. Super easy to work on.
 

Attachments

  • 22.JPG
    22.JPG
    65.7 KB · Views: 60
  • 23.JPG
    23.JPG
    66.6 KB · Views: 55
  • 24.JPG
    24.JPG
    69.4 KB · Views: 57
  • 25.JPG
    25.JPG
    65.8 KB · Views: 57
OP
OP
broncosbybart

broncosbybart

Bronco Guru
Joined
Mar 13, 2002
Messages
2,644
After that, I put the Barnes cover on the axle to determine how much to chop off. Problem! I still can't pick the thing up!!

Had to get the engine hoist out for what came next. I put a new saw blade in the band saw and got the saw horses out. Then came a little maneuvering and we went full ghetto with the use of the saw...

End result? About 1.25" of scrap metal. I now present to you the GM 13 bolt!


Oh, and yes, that is a new ARB for the rear. You knew there was a real reason why the carrier had to come out ;D
 

Attachments

  • ARB.JPG
    ARB.JPG
    59.7 KB · Views: 97
  • 29.JPG
    29.JPG
    58.3 KB · Views: 108
  • 28.JPG
    28.JPG
    62.4 KB · Views: 110
  • 27.JPG
    27.JPG
    65.9 KB · Views: 100
  • 26.JPG
    26.JPG
    67.6 KB · Views: 102
OP
OP
broncosbybart

broncosbybart

Bronco Guru
Joined
Mar 13, 2002
Messages
2,644
Thanks guys. Slow and steady, right?

Started on the engine. The truck it came from showed 73k on the odometer, but the engine was covered with sludge and grime. After 3 rounds with the pressure washer and degreaser, it cleaned up. Here are a few before and after pics. Amazing- there's an engine under all that grime!

My wife is really happy about me 'borrowing' the garden sprayer and loading it up with Zep degreaser/water mix to hose it all down.
 

Attachments

  • 1c.jpg
    1c.jpg
    119.6 KB · Views: 149
  • 1b.jpg
    1b.jpg
    128.2 KB · Views: 170
  • 1.JPG
    1.JPG
    64.5 KB · Views: 159
  • Engine.JPG
    Engine.JPG
    68.5 KB · Views: 158
OP
OP
broncosbybart

broncosbybart

Bronco Guru
Joined
Mar 13, 2002
Messages
2,644
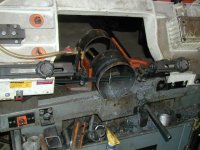
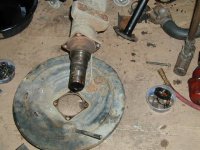
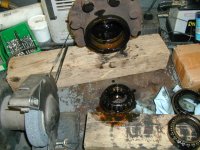
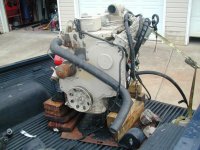
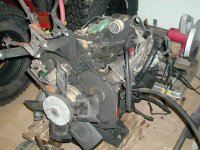
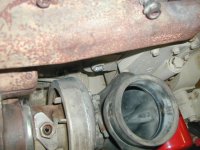
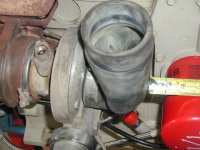
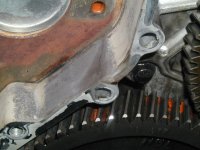
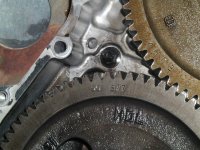
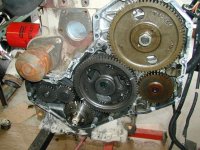
Like everything else I touch, I can't leave anything well enough alone. The amount of sludge on the exterior of the motor had me concerned, so I figure it won't hurt to tear it down and inspect it all.

A paper copy of the Cummins manual is around $150. After a bit of digging, I found a huge PDF of the thing online and downloaded it. It is like 500 pages and is detailed but easy to follow for the most part. Armed with a few nights worth of reading, I tore into the engine and now it is scattered in a thousand pieces on my work bench, on the floor, and across the garage...

The 4btswaps forum has been a valuable resource, but I haven't found anything on there detailing a tear down and rebuild of these engines. So, here goes!


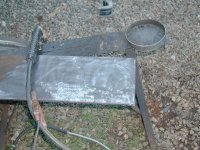
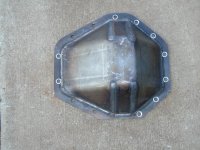
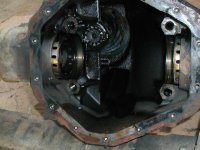
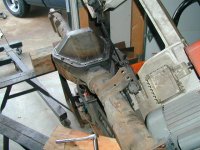
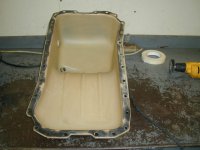
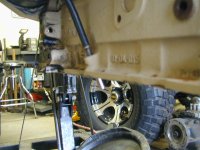
Some of the more astute (or just paying attention at all) might see that the oil pan in the above pic was mounted with the sump facing the rear. It was originally facing forward. Yes, the pan can be flipped from the front to the back, as people say. The only things that need to be done are to source a new pickup tube (I swapped one out with a another engine) and will have to relocate the dip stick from the front of the block to the back.

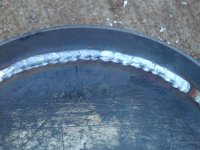
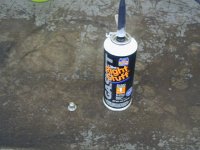
There were 28 bolts with 10mm heads holding the oil pan on. Ok, there was also a lot of sealant as well. Nothing a small hammer and flat blade screw driver couldn't fix.

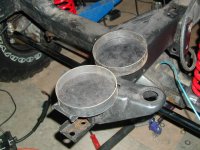
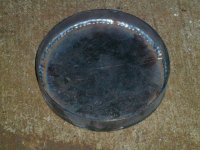
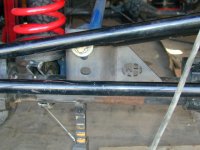
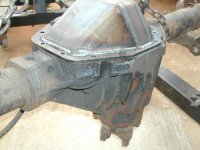
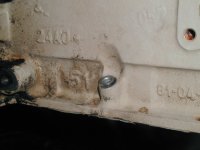
Got the oil pan all cleaned up. A wire wheel on a drill and a gasket scraper work well to remove all the old stuff on the sealing flanges. I will have to cut the pan at some point and clearance it to play nice with the Dana 60 front axle.

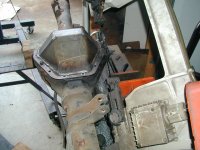
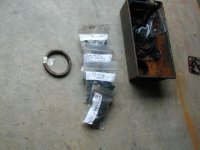
Seeing that tape roll reminded me of something. These things are totally new to me. I highly recommend ziplocks and markers to inventory all the hardware and misc 'stuff' as it comes off. I can identify just about any piece that comes off a Bronco. Not so much with this thing.
 

Attachments

  • 10.JPG
    10.JPG
    62.3 KB · Views: 66
  • 11.JPG
    11.JPG
    57.9 KB · Views: 54
OP
OP
broncosbybart

broncosbybart

Bronco Guru
Joined
Mar 13, 2002
Messages
2,644
The first issue I forsee is having trouble with the exhaust dump location coming off the back of the turbo.

My plans right now are to move the engine back as far as I can to try and get some weight off of the nose and may have to cut the firewall a good bit in order to get enough room for the downpipe.

And, no your eyes aren't deceiving you. The turbo is just kinda hanging there in the pic. You get the idea.

The HX30W ends pretty much dead even with the back of the block. Thought about trying to move the turbo forward using a different manifold, but I noticed that there is about 1" between the intake boot and the oil filter. The wastegate actuator has about the same amount of clearance to the oil cooler. Pondering on what to do for relocating the turbo.
 

Attachments

  • 14.JPG
    14.JPG
    65.6 KB · Views: 62
  • 16.JPG
    16.JPG
    61.7 KB · Views: 58
  • 15.JPG
    15.JPG
    59.7 KB · Views: 58
OP
OP
broncosbybart

broncosbybart

Bronco Guru
Joined
Mar 13, 2002
Messages
2,644
More dissection. I took the timing cover off to check the KDP. The KDP issue is what they call the 'killer dowel pin'. There is a pin that holds the front timing housing in place. The pin can fall out over time and get tangled into the timing gears and cause mayhem. After doing some reading, it sounds like all engines pre 2003 are subject to having dowel pin issues.

The dowel pin was in place and there, but the timing housing decided to give up the fight.


I don't have a spool gun or a TIG, so I can't fix it. Going to have to tear it apart and see if a friend of mine can weld it up. It did leak for sure. I could see water drippings (from the pressure washer) around the crack and there was a fair amount of water in the oil pan when I took it back off. Are you kidding me?? Can't wait to see what else is wrong. Plans are to order a Cummins service manual tomorrow and get some guidance as I begin to tear it down. I want to inspect it thoroughly and know what may or may not need work before I install it.
 

Attachments

  • 9.JPG
    9.JPG
    61.9 KB · Views: 65
  • 8.JPG
    8.JPG
    71.1 KB · Views: 65
  • 7.JPG
    7.JPG
    71.9 KB · Views: 69
OP
OP
broncosbybart

broncosbybart

Bronco Guru
Joined
Mar 13, 2002
Messages
2,644
Next thing I wanted to do is to relocate the dipstick tube to the back of the engine since I will be switching the pan orientation to be rear sump.

A small punch and a hammer knocked the 'freeze plug' looking plug out of the rear hole. The dipstick wasn't so easy. I did find that a deep well 1/4 drive 6mm socket fit perfectly in from the bottom and I was able to use it to knock the dipstick out.

It was in there pretty tight. Not sure how I'm going to set it back in the block yet, but I will wait on that for a while.

I did put the plug in the front hole. I used some right stuff and a hammer and set it back in place. I didn't see a need for sourcing a new plug. This one fit very well into place. Besides, the right stuff can't be wrong, right?
 

Attachments

  • 29.JPG
    29.JPG
    61.5 KB · Views: 55
  • 30.JPG
    30.JPG
    58 KB · Views: 52
  • 31.JPG
    31.JPG
    61 KB · Views: 55
  • 32.JPG
    32.JPG
    62.8 KB · Views: 59
  • 33.JPG
    33.JPG
    61.4 KB · Views: 49
Top