• Just a reminder that you won't be able to start new posts or reply to existings posts in the Archive forum.

    This is where all the old posts go so they can still be used for reference and searched.
  • Welcome to ClassicBroncos! - You are currently viewing the forums as a GUEST. To take advantage of all the site features, please take a moment to register. It's fast, simple and absolutely free. So please join our community today!
    If you have problems registering or can't log into your account, please contact Admin.

Ms Piggy- Cummins 4BT Bronco with a slight weight issue!

OP
OP
broncosbybart

broncosbybart

Bronco Guru
Joined
Mar 13, 2002
Messages
2,644
Thank you!

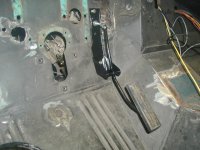
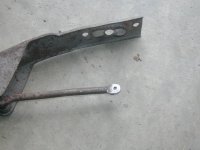
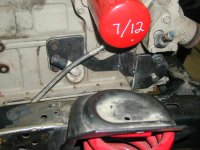
Ok, so this isn't exactly being built in real-time. She's far from done but I'll oblige you and give a sneak peek at the throttle assembly. :)

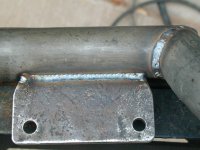
I used a Lokar 48" throttle cable and shortened it about 6". Here it is as best I can show it. I used the throttle arm that came with the engine and I fabbed up a tab to mount to the shutoff solenoid bracket. It was about the best position I could find as everything fits together pretty tight in the engine compartment.
 

Attachments

  • 13.JPG
    13.JPG
    63.4 KB · Views: 81
  • 14.JPG
    14.JPG
    66.8 KB · Views: 85
  • 15.JPG
    15.JPG
    59.3 KB · Views: 77
  • 22.JPG
    22.JPG
    64.3 KB · Views: 72
  • 23.JPG
    23.JPG
    63.9 KB · Views: 71
  • 19.JPG
    19.JPG
    67.1 KB · Views: 81
OP
OP
broncosbybart

broncosbybart

Bronco Guru
Joined
Mar 13, 2002
Messages
2,644
Ready for this to be a Bronco build thread again?

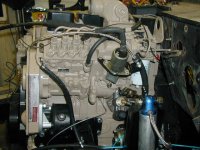
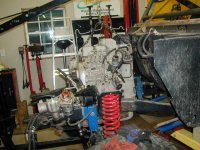
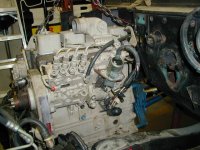
Got the garage cleaned up a little and slid the Bronco back over to the lift. Took the engine off the stand and used the hoist to get it set in the nose of the Bronco. After sizing up a few high dollar scraps of lumber I think I have it where it could end up.

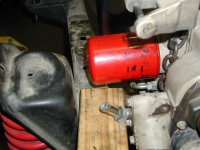
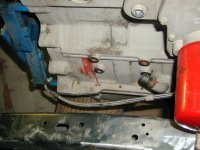
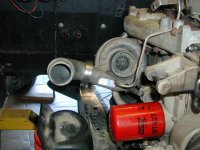
A few issues though. First, the oil filter is going to be very close to the inner fender. The fitting going to the heater hose on the lower water neck is about in line with the end of the oil filter. I might have to modify that as well.

The oil return pipe for the turbo is right in the way of the mounting points on the block that I intend to use.

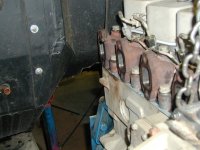
Of course the front crossmember will need to be modified, which is to be expected. On top of all that, I think I may need to massage the firewall a bit for the turbo/exhaust manifold.

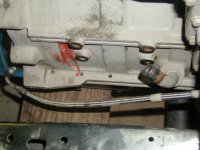
The engine is slid back pretty far and is about as low as I think I can get it. The oil pan will need to be cut and modified to fit around the D60 front axle but the fit is better than I expected it to be. That may change if I have to slide the engine more toward the driver's side. We will see.

At least it feels a little like progress even though there is a bit more to do that I was hoping. Here are a couple of pics of what I'm up against. Might take a little figuring from here.
 

Attachments

  • 8.JPG
    8.JPG
    63.8 KB · Views: 71
  • 7.JPG
    7.JPG
    65.3 KB · Views: 73
  • 6.JPG
    6.JPG
    70.4 KB · Views: 74
  • 5.JPG
    5.JPG
    67.5 KB · Views: 70
  • 4.JPG
    4.JPG
    63.2 KB · Views: 62
  • 3.JPG
    3.JPG
    62.1 KB · Views: 57
  • 2.JPG
    2.JPG
    60.5 KB · Views: 63
  • 1.JPG
    1.JPG
    62.2 KB · Views: 63
  • 9.JPG
    9.JPG
    63.3 KB · Views: 76

big a

Jr. Member
Joined
Apr 24, 2012
Messages
273
Loc.
Fort Worth
Ready for this to be a Bronco build thread again?

Got the garage cleaned up a little and slid the Bronco back over to the lift. Took the engine off the stand and used the hoist to get it set in the nose of the Bronco. After sizing up a few high dollar scraps of lumber I think I have it where it could end up.

A few issues though. First, the oil filter is going to be very close to the inner fender. The fitting going to the heater hose on the lower water neck is about in line with the end of the oil filter. I might have to modify that as well.

The oil return pipe for the turbo is right in the way of the mounting points on the block that I intend to use.

Of course the front crossmember will need to be modified, which is to be expected. On top of all that, I think I may need to massage the firewall a bit for the turbo/exhaust manifold.

The engine is slid back pretty far and is about as low as I think I can get it. The oil pan will need to be cut and modified to fit around the D60 front axle but the fit is better than I expected it to be. That may change if I have to slide the engine more toward the driver's side. We will see.

At least it feels a little like progress even though there is a bit more to do that I was hoping. Here are a couple of pics of what I'm up against. Might take a little figuring from here.

Very cool!!!! Thx for detailing your throttle setup! Pertaining to your question, shoot yeah, make it a bronco thread again!!!!!

I don't know if you plan on running a/c or not. I'm running the Freightliner mid mount bracket. My engine is the same as yours and has the horizontal filter. I bought a dual filter remote setup from summitracing to remedy the filter interference issue. Plus, you can use 1 qt filters and make up the difference in volume loss due to oil pan clearances. I can get you all the part numbers if you're interested.

-Andy
 
OP
OP
broncosbybart

broncosbybart

Bronco Guru
Joined
Mar 13, 2002
Messages
2,644
Thanks for the thoughts. I got it squared away.

Made some more progress. And found some more issues. And some of the steps forward take some retracing...

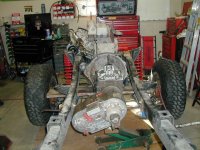
Here we go. For mock up purposes I attached the transmission and transfer case. First was the adapter plate from a Dodge 2500 along with the starter (to check fit). I omitted the clutch and flywheel for now. The bell housing came next. Finally some American fastners! No metric! The trans was pretty heavy to do by myself. The engine hoist came in very handy for getting it set in place. Last was the Atlas 4 speed transfer case. A quick fit indicated that I needed to clock it 1 hole from the 'flat' position. The 24" between frame rails makes things interesting. For now a combination of wood and the engine hoist/roll jack are being used to position things.

The front pulley and damper had to be removed to get the engine clear of the front cross member.
 

Attachments

  • 16.JPG
    16.JPG
    65.1 KB · Views: 68
  • 15.JPG
    15.JPG
    61.1 KB · Views: 74
  • 14.JPG
    14.JPG
    67.1 KB · Views: 79
  • 13.JPG
    13.JPG
    66.6 KB · Views: 78
  • 12.JPG
    12.JPG
    68.9 KB · Views: 84
  • 11.JPG
    11.JPG
    65.7 KB · Views: 81
  • 10.JPG
    10.JPG
    68.3 KB · Views: 77

big a

Jr. Member
Joined
Apr 24, 2012
Messages
273
Loc.
Fort Worth
Btw, I saw you engine mounts over on 4btswaps. They look awesome! And, I liked the crossmember and the welding looked great as well!
 
Last edited:
OP
OP
broncosbybart

broncosbybart

Bronco Guru
Joined
Mar 13, 2002
Messages
2,644
Come on now, that's cheating :D

I haven't posted much on there as I don't enjoy uploading to photobucket and linking pics, but did want to post that info on there for anyone who is contemplating the swap to see what I did.

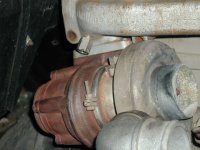
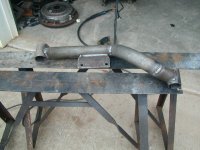
A few things will need some work. The first is the turbo. The compressor housing is pointed straight out toward the fender and it has a bunch of oxidization in it. I will have to remove the housing, clean it up, and clock it on re-installation.

With the new to me exhaust housing, the turbo drains no longer line up anymore and will need some work.

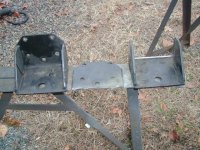
For the mounts, I started off with the trans cross member. A piece of C channel was cut to length and my idea was to use some 1/4" plate to use factory Bronco style transmission mounts. I thought about using the rectangular Energy Suspension mount but I didn't trust it as nothing goes through it solidly and it could rip.

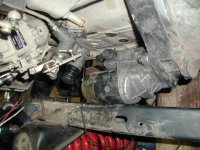
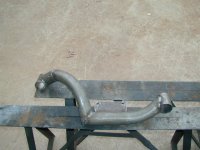
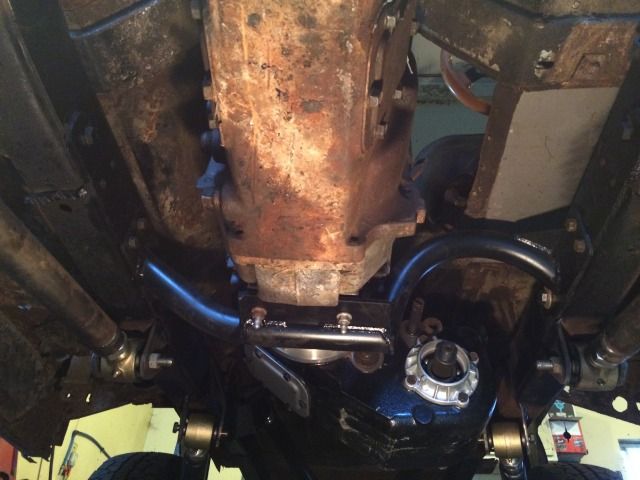
After getting halfway through it, I realized this wasn't going to work. The front drive shaft was going to contact it heavily when the axle drooped unless the cross member was dropped down further than I wanted it to.

So, out came the tubing bender and after a fair bit of work this was fabbed. It is made from 2" .120 wall DOM tube, which is the biggest stuff I can bend here. It might be a bit weaker than I really would like but it should be fine unless the weight of the rig is put upon it while wheeling. This took quite a while to figure out to clear the front drive shaft and for exhaust clearance on the other side.

Next will be the motor mounts. Maybe over the weekend. And yeah, that is the old oil filter that came off the motor. I have it sitting on there to keep crap out of the engine. Ignore the crusties on the turbo- it will be gone over as well.
 

Attachments

  • 26.JPG
    26.JPG
    63.5 KB · Views: 73
  • 25.JPG
    25.JPG
    62.4 KB · Views: 58
  • 22.JPG
    22.JPG
    63.7 KB · Views: 59
  • 21.JPG
    21.JPG
    62.1 KB · Views: 51
  • 20.JPG
    20.JPG
    67.6 KB · Views: 57
  • 19.JPG
    19.JPG
    63.2 KB · Views: 54
  • 18.JPG
    18.JPG
    63.4 KB · Views: 54
  • 17.JPG
    17.JPG
    63 KB · Views: 57
  • 24.JPG
    24.JPG
    63.8 KB · Views: 64
  • 27.JPG
    27.JPG
    65.3 KB · Views: 69

big a

Jr. Member
Joined
Apr 24, 2012
Messages
273
Loc.
Fort Worth
As for your disclaimer in your last paragraph, this isn't 4btswaps, you don't have to worry about someone pointing something out that I'm more than sure you are already aware of!!!! I'm living vicariously at the moment until I get power out to my new shop so I can get back to work on mine :)
 
OP
OP
broncosbybart

broncosbybart

Bronco Guru
Joined
Mar 13, 2002
Messages
2,644
Ha. I hear you. I wore out DBteak's build thread after he did his...

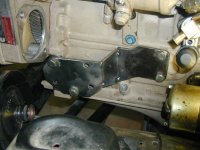
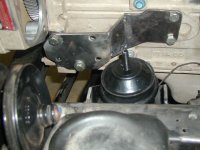
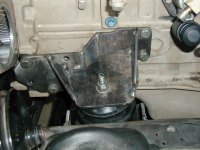
Now onto the engine mounts. To start, I cut the original motor mounts apart and plan to use the 'cups' on the frame and use the left over plates to begin fabbing up the steel pieces for the engine.

One pic shows the beginning of the pass side. The oil return line for the turbo is right in the way of where I wanted to put the rubber mount.

Next is the driver's side starting out. I removed the PS pump to make the job easier but did keep it handy for a few trial fits to make sure nothing gets in the way during the process.

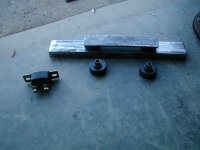
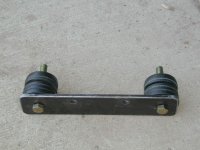
Here are a few pics of the motor mounts I used. On the left is an original Lord style found in the Chevy bread trucks. The rubber on it was cracked and soft so I decided not to use them. The new mounts are Anchor part # 2859. They also make a 2859SR (solid rubber) that is cheaper but I went for the hydraulic ones. These were right at $30 each from Summit Racing and are the same dimensions as the Lord mounts.

I drilled the lower mounts for the 2 studs on the motor isolators.

Then, the assembly tack welded to the frame rail on the driver's side. Next is a handy dandy USPS box being recycled into a template for fabricating the upper plate on the pass side. Like has been said elsewhere, CAD (cardboard aided design) at it's finest.

There was a lot of cutting, grinding, and fitting taking place here. All the material used has been 1/4" thick mild steel. It should hold...
 

Attachments

  • 32.JPG
    32.JPG
    66.4 KB · Views: 56
  • 31.JPG
    31.JPG
    60 KB · Views: 54
  • 30.JPG
    30.JPG
    64 KB · Views: 54
  • 29.JPG
    29.JPG
    63.4 KB · Views: 50
  • 28.JPG
    28.JPG
    68.8 KB · Views: 50
  • 33.JPG
    33.JPG
    66.9 KB · Views: 52
  • 34.JPG
    34.JPG
    59.3 KB · Views: 58
  • 35.JPG
    35.JPG
    62.9 KB · Views: 58
  • 36.JPG
    36.JPG
    62.2 KB · Views: 56
OP
OP
broncosbybart

broncosbybart

Bronco Guru
Joined
Mar 13, 2002
Messages
2,644
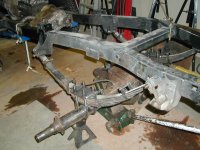
With the motor all mocked up, it was time to do something else. Got started on the rear axle.

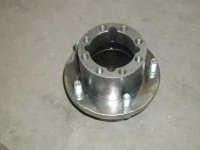
I filled the remainder of the holes from the old 8 lug studs on the rear hubs. Pounded the new studs in for the 5x5.5 bolt pattern.

Next order of business was to put the outer wheel bearings in the hubs, then the stupid snap ring, and after that the inner wheel bearing and grease seal. The bearings all get removed and installed from the inside face of the hub. I guess I forgot to get a pic of the axle with the hubs on. Will try and do that. I have some work to do on the brake mounts. The ones I have are straight (flat piece of metal) and they won't work as is.

Got the old rear out and the 14 bolt is now loosely set in place for mock up. More to come
 

Attachments

  • 42.JPG
    42.JPG
    62.4 KB · Views: 30
  • 40.JPG
    40.JPG
    67.8 KB · Views: 36
  • 37.JPG
    37.JPG
    66 KB · Views: 43
  • 36.JPG
    36.JPG
    68 KB · Views: 37
  • 35.JPG
    35.JPG
    61.8 KB · Views: 36
  • 34.JPG
    34.JPG
    56.4 KB · Views: 32
  • 32.JPG
    32.JPG
    61.4 KB · Views: 33

big a

Jr. Member
Joined
Apr 24, 2012
Messages
273
Loc.
Fort Worth
That's awesome!!! I'm an engineer and design stuff and problem solve all the time and its cool to see what you're doing here! I like all the machined, cut and fabbed parts!

Btw, the motor mounts look cool!!! I like the design and intricate lines!!! I just always hate how neat parts like that get lost underneath everything.
-Andy
 
Last edited:

COSCAG00

Sr. Member
Joined
May 16, 2011
Messages
426
Both of y'all keep up the great work. I really enjoy driving my 4BT around, its so much fun. I am contemplating on doing another Bronco with a 4BT right now.
 

big a

Jr. Member
Joined
Apr 24, 2012
Messages
273
Loc.
Fort Worth
Not much work on my end :( still trying to finish out my house and get the electrical company out to upgrade my service so I can add power to the shop. On a great note though, I got to drive a 4bt/m5r2/np205 ystrdy! My buddy dropped one in a bronco ii and we test drove it for the first time! Man it was fun!!! I can imagine how much you're enjoying yours!!! Sooner or later I'll be back to mine. In the meantime, just living vicariously!
-Andy
 
OP
OP
broncosbybart

broncosbybart

Bronco Guru
Joined
Mar 13, 2002
Messages
2,644
Thanks guys!

The cross member sure does, I stumbled across your thread after doing this crossmember- I promise :)

That said, if I had seen your idea first, I would have plagiarized it anyway.

Had a hair-brained idea that I came up with. While working on the motor, I couldn't help but notice that the bolt for the heim steering on the pass side knuckle looked a little wonky.

I removed it and noticed that the hole in the knuckle was beginning to oval. That got the thoughts running in my mind, so I thought I'd try and make that bolt double shear, as the knuckle has provision for using a high steer arm. I contacted Dynatrac and ordered a blank high steer arm (no hole drilled in it for the 3/4" bolt). It arrived a couple days ago. I mocked it up and guess what? The arm was too short. The 3/4" bolt was located beyond the end of the arm. It was an inch too short. Sooo, I decided to pull the axle completely and take the it up to Chris at Mars Fab to see if he could cut an arm for it with his fancy computerized plasma table. He said it would be after the 1st of the new year before he could get to it.

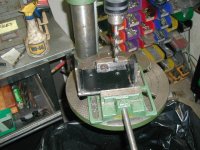
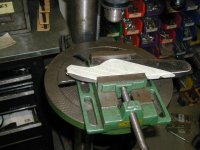
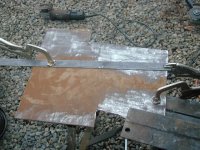
Well that wasn't going to work. So, out came the plasma cutter, grinders, welder, and drill press. I only had some 1/4" plate here, so I had to make 2 identical pieces and sandwich them together. After cutting and forming them, I beveled the edges that faced each other so I could weld them together. I also cut some holes in one of the arms so that I could plug weld them also. The end result was an arm that is 1/2" thick. Having 1/2" stuff here would have been nice...

Just got this done tonight. I'm happy with the end result. Granted it isn't as fancy as the Dynatrac unit that I have to return, but it will work just fine and is a ton cheaper.

Oh, and the whole thing with the tape and all is that I used a 1/4" drive socket that fit snugly into the holes on the Dynatrac arm to mark the locations that I needed to drill into the new arm. A tap or two with a small hammer is all it takes to mark the tape enough to determine accurately where the new holes need to go. Worked great.
 

Attachments

  • 53.JPG
    53.JPG
    60.2 KB · Views: 57
  • 49.JPG
    49.JPG
    60.4 KB · Views: 49
  • 50.JPG
    50.JPG
    62 KB · Views: 49
  • 48.JPG
    48.JPG
    61.8 KB · Views: 47
  • 46.JPG
    46.JPG
    61.9 KB · Views: 49
  • 44.JPG
    44.JPG
    68.7 KB · Views: 47
  • 42.JPG
    42.JPG
    64.3 KB · Views: 51
  • 41.JPG
    41.JPG
    65 KB · Views: 49
  • 55.JPG
    55.JPG
    62.8 KB · Views: 64
OP
OP
broncosbybart

broncosbybart

Bronco Guru
Joined
Mar 13, 2002
Messages
2,644
Thanks guys!

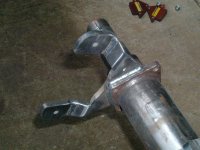
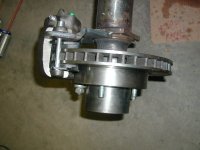
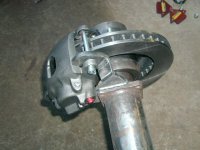
Jumped around a bit, and I finished the disc brake brackets for the rear axle. These were weld ons from Barnes 4WD. They weren't even close to working as is but I expected that. Had to cut them, modify them some and weld it all back together. They do make a bolt on kit but I doubt they'd work with these rotors. Rotors used were standard disc rotors for the 76+ Bronco. Calipers were 3/4 ton Chevy 2wd pickup from 75 to mid 80's. They're single piston but the pistons are pretty big.
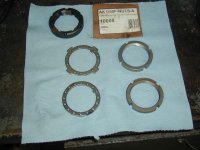
While there, I pressed in the grease seals for the rear hubs and bolted the hubs down using new 4 slot style hub nuts. The retainer that goes between the nuts needed to have the 4 ears ground off, per the picture. There is 1 as packaged with the ears on it and one that I had modified already as well as the part number. These are just standard D60 axle parts. They thread right on the 14 bolt axle.

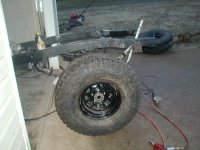
As well is a sneak peek at the new shoes. Found some 37" military MTR's and bought some cheap steelies from Summit Racing.
 

Attachments

  • 50.JPG
    50.JPG
    58.4 KB · Views: 48
  • 49.JPG
    49.JPG
    59.6 KB · Views: 56
  • 48.JPG
    48.JPG
    53.5 KB · Views: 52
  • 47.JPG
    47.JPG
    60.1 KB · Views: 51
  • 46.JPG
    46.JPG
    57.3 KB · Views: 50
  • 45.JPG
    45.JPG
    69.6 KB · Views: 46
  • 44.JPG
    44.JPG
    56.5 KB · Views: 42
  • 43.JPG
    43.JPG
    59.2 KB · Views: 46
  • 51.JPG
    51.JPG
    60.9 KB · Views: 49
  • 52.JPG
    52.JPG
    62.3 KB · Views: 53
Top