• Welcome to ClassicBroncos! - You are currently viewing the forums as a GUEST. To take advantage of all the site features, please take a moment to register. It's fast, simple and absolutely free. So please join our community today!
    If you have problems registering or can't log into your account, please contact Admin.

Narrowing a 9"

bigjhoov

nobody
Joined
Apr 10, 2005
Messages
3,581
What size tube are those made for? The ones I used were for 3" OD tubes. The tube on my new housing is 3-1/4".


Sent from my iPhone using Tapatalk

Seems as though they are for 3" axle tubes with an i.d. of 2.62". After looking further I noticed that there are both slip in as well as butt weld available. I guess I'm just used to the slip in style in the aftermarket housings. Sorry for any confusion.
 
OP
OP
Boss Hugg

Boss Hugg

Contributor
Bronco Guru
Joined
Jun 8, 2010
Messages
2,203
Seems as though they are for 3" axle tubes with an i.d. of 2.62". After looking further I noticed that there are both slip in as well as butt weld available. I guess I'm just used to the slip in style in the aftermarket housings. Sorry for any confusion.


I really wanted to turn these down to fit inside, but I had lots of folks tell me to butt weld them... and I'm not sure I could've gotten the near perfect alignment if they had slipped inside. The angles might have never lined up ???

But these things are burnt in deep. I was proud of my little 175 Lincoln. Especially when I realized I had my .024 wire in it and a .035 tip! Once corrected, it was very nice.


Sent from my iPad using Tapatalk
 

Timmy390

Contributor
Bronco Guru
Joined
Jan 1, 2011
Messages
5,753
Loc.
Conway, AR
I really wanted to turn these down to fit inside, and........ I'm not sure I could've gotten the near perfect alignment if they had slipped inside. The angles might have never lined up ???

I had mine turned down to fit inside. Came out spot on......

Tim
 
OP
OP
Boss Hugg

Boss Hugg

Contributor
Bronco Guru
Joined
Jun 8, 2010
Messages
2,203
I had mine turned down to fit inside. Came out spot on......

Tim


Might try it on the next one. The second reason I bought the fixture was to do more housings, and maybe sell a few.?? And I'm thinking that because of the reduction in tube diameter at the end of these particular housings, it may be possible to reuse the original ends by turning them down to the proper size to slip into the tube after it's cut off.


Sent from my iPhone using Tapatalk
 

Timmy390

Contributor
Bronco Guru
Joined
Jan 1, 2011
Messages
5,753
Loc.
Conway, AR
Oh I think you should use the fixture no matter how you do the ends. It's the only way to get things right IMO.

That said, I didn't have a fixture so I used the 3rd member and the axles to align everything. Welding trashed the old bearings but I was changing them anyway. My housing came out really nice. No more leaks from the ends being damaged.

I've since went to 31 spline axles and set 20 bearings with no issues.

Tim
 
OP
OP
Boss Hugg

Boss Hugg

Contributor
Bronco Guru
Joined
Jun 8, 2010
Messages
2,203
Look what I got!

c6b01c6ea0d3e299f5b05df4a8260f5a.jpg


Sent from my iPhone using Tapatalk
 

Skiddy

Bronco Guru
Joined
Oct 8, 2003
Messages
11,561
nice and when you put the gear and bearings on do it like this;D
 

Attachments

  • Grizz.jpg
    Grizz.jpg
    69.9 KB · Views: 63
OP
OP
Boss Hugg

Boss Hugg

Contributor
Bronco Guru
Joined
Jun 8, 2010
Messages
2,203
Narrowing a 9"

I heard that increases fuel mileage like 178.45%.


Sent from my iPhone using Tapatalk
 
Last edited:
OP
OP
Boss Hugg

Boss Hugg

Contributor
Bronco Guru
Joined
Jun 8, 2010
Messages
2,203
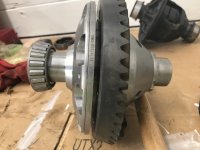
Well, at 10pm I pulled out the driveway to go to the car wash. Today I pulled the third member I'm starting with and got it disassembled. Man, I didn't know gear oil could cake up like that. So after dealing many other distractions today, i decided late at night would be the best (coolest) time to go to the car wash to clean the case up. Afterward there was nothing left to do but....

c099286df4a15b8a72c5314f20e79e71.jpg


Get ice cream.

But it turns out they close up at, like, dawn every evening (that's pretty early if you ask me...). So off to the next best...

488d4ce1b9f28608f4de438822327886.jpg


If you now wondering where the action shots from the car wash are, I'll remind you that the kids went to see their grandmother at the zoo, so I'm by myself. And I pretty much needed scuba gear so I certainly wasn't getting my phone out with water spraying everywhere.

Maybe some more pics later tonight.


Sent from my iPhone using Tapatalk
 
OP
OP
Boss Hugg

Boss Hugg

Contributor
Bronco Guru
Joined
Jun 8, 2010
Messages
2,203
Narrowing a 9"

Its going down....

358797daadbc65ed0e1d403858696ceb.jpg


Yes, on the kitchen table. BUT! There one inch thick styrofoam under the old Spider-Man bed sheet. (I guess there are so many new spider man movies that this sheet is obsolete??? I found it in the shop floor.)

And I thought I'd share something else I ran across today.

627b8eabd0dd9d3ce9be0d55f592c0ab.jpg


Got it way cheap!

Now! To figure out how to build a chunk... Hey, Ian!!!! (Who knows maybe that crazy Canadian off-roader from TV will see this?)

I'm probably gonna call it a night now. It's 11:30 pm and I was up at 4am thinking about a 98 year old ww2 navy vet that had three ships shot out from under him. He was taken to the ER this week with congestive heart failure. I spent an hour visiting with him this morning and he looked a lot better than I was told. So...

Until next time.


Sent from my iPhone using Tapatalk
 
Last edited:
OP
OP
Boss Hugg

Boss Hugg

Contributor
Bronco Guru
Joined
Jun 8, 2010
Messages
2,203
Here's a few more gadgets I got for this project...

23f19885e584275b16ec90dad063346a.jpg


Did I weld this one at the right angle???

f0431c3cc249a7c5286a475439a1c121.jpg


I decided to go with Barnes4wd u bolt eliminator kit because it was cheaper than having a heavy u bolt set and hd plates shipped to me. Plus, this allows me to source hardware locally, rather than ordering longer U bolts if I want to put blocks under it later.


Sent from my iPhone using Tapatalk
 
OP
OP
Boss Hugg

Boss Hugg

Contributor
Bronco Guru
Joined
Jun 8, 2010
Messages
2,203
This morning, we're pressed for time....

8c93e0ea54bac61ee4c456e0bbd5c787.jpg


And after that I slowed down for the lunch of champions.

6e6f639f94749735391873917d3dd37f.jpg


There's a lot going on in that pic...


Sent from my iPhone using Tapatalk
 
OP
OP
Boss Hugg

Boss Hugg

Contributor
Bronco Guru
Joined
Jun 8, 2010
Messages
2,203
One piece at a time.

54ca9bd229d323c4314ce4bc7e92d711.jpg


Sent from my iPhone using Tapatalk
 
OP
OP
Boss Hugg

Boss Hugg

Contributor
Bronco Guru
Joined
Jun 8, 2010
Messages
2,203
I guess it's time to open myself to the real criticism. I've fought with this thing. The crush bearing ended up requiring a 12 ton press... then the outer bearing wouldn't hold the preload because I cleaned up the black finish so the bearing press on a little easier... so after putting it together, I tightened the nut until it took about 25 in lbs to rotate the pinion housing. That's what the instruction called for with new bearings.

So then I pull out the fancy pro form (cheap) pinion depth setter to set the pinion depth (is that statement too redundant? I heard you need some redundancy for long, high risk missions.)

b13464c96d10503ac75b574e95f18903.jpg


483b315ccada26efbc15e14c8beacec0.jpg


the pinion and gear were marked 2909 for pinion depth? Does anyone have any idea what that refers to? The 9" gear jobs I read about talk about a PD around 1"+/-. I did some lookin around and found reasons to decide maybe it meant 1.029 with .009 backlash. Whatever...

I played with gear pattern until I came up with these pics. Here's the drive side. Same in two different places.

3e5f6f9992b217466e3662394d63fe6d.jpg


Coast side.

743131b299365936e70e26b7fb0f6db8.jpg


So now I guess it's time to slap in in the housing and put some shafts in it.

And I'll probably leave the table for the wife to clean up...


Sent from my iPhone using Tapatalk
 

Yeller

Contributor
Bronco Guru
Joined
Mar 27, 2012
Messages
6,848
Loc.
Rogers County Oklahoma
Looks great to me I'd run that.

May I ask why crush sleeve over solid shims? Crush sleeve is the most common failure I repair. In our application they don't like side loading from using the yolk as s skid plate or getting bound up in reverse, you can create enough load to crush it. Nothing wrong with it just not not something I would ship a customer, I'd feel like I needed to warratee it.
 
Top