• Welcome to ClassicBroncos! - You are currently viewing the forums as a GUEST. To take advantage of all the site features, please take a moment to register. It's fast, simple and absolutely free. So please join our community today!
    If you have problems registering or can't log into your account, please contact Admin.

The what did I get myself into 1971 Restomod - BUILD THREAD

DirtDonk

Contributor
Bronco Guru
Joined
Nov 3, 2003
Messages
49,379
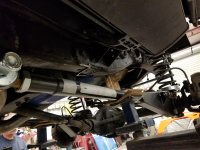
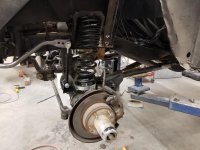
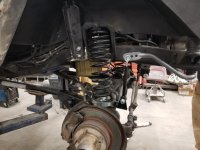
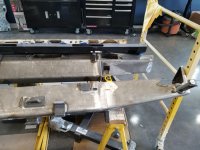
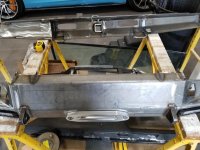
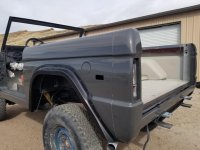
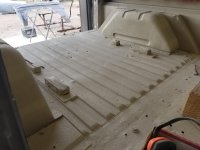
I can't tell, but they may be part of that panel out at the ends where they meet up with the other panel. I have only seen them in the all-together, but haven't noted them when the pieces were apart.

I have pictures of them here somewhere. I'll take a look and see if I can find them. Maybe someone else has a better filing system and can get them quicker though?

Paul
 

sprdv1

Contributor
REBEL
Joined
Mar 8, 2007
Messages
81,983
Yes there was factory insulation on the top/or bottom of the cowl. I have not seen it as thick as yours, usually it is like 1/4" thick. But it could be that it is starting to separate and expanding? after 40-50 years the factory stuff pretty much falls off.
I believe the replacement fire wall insulator that the vendors sell, comes with sections that you can glue (spray adhesive) to the bottom of the cowl.
Having done this once, I prefer to use dyna-mat, boom-mat, or a similar product instead on the fire wall.

yeah, one of those products definitely helps..
 

sprdv1

Contributor
REBEL
Joined
Mar 8, 2007
Messages
81,983
I have pictures of them here somewhere. I'll take a look and see if I can find them. Maybe someone else has a better filing system and can get them quicker though?

right, lol Hard to keep up w/stuff these days..
 

904Bronco

Contributor
Bronco Guru
Joined
Sep 28, 2004
Messages
6,026
Loc.
San Martin, CA

Attachments

  • L-side Rust.JPG
    L-side Rust.JPG
    165 KB · Views: 163
OP
OP
A

Audifan

Contributor
Full Member
Joined
Nov 25, 2018
Messages
250
On both sides of the cowl... Those openings

Ah, gotcha. So it looks like those holes are created by how the front cowl piece sits against the windshield cowl piece.

I'll make sure we plug them when it goes together.

Thanks
 
OP
OP
A

Audifan

Contributor
Full Member
Joined
Nov 25, 2018
Messages
250
Finally got some more work done.

Got the new cowl and lower cowl welded in and bolted in the windshield frame. Still gotta strip the paint on the windshield frame and weld a bunch of bolt and screw holes up in the body, then she's ready for primer.

I replaced the rotten insulation that was on the underside of the lower cowl piece with self adhesive under hood insulation from dynamat. Really nice stuff and was easy to cut to shape, and stuck on great.
https://www.amazon.com/gp/product/B00069QLVC/ref=ppx_yo_dt_b_asin_title_o02_s00?ie=UTF8&psc=1
And I have plenty left over to use under the dash to seal that off.

Also got the WH passenger seat storage piece and will be welding that into the passenger side floorboard to make it match the drivers side. This gives me some nice storage on the passenger side as well as a much better mounting solution for my seats.
 

Attachments

  • 20191018_150323.jpg
    20191018_150323.jpg
    121.9 KB · Views: 158
  • 20191018_150336.jpg
    20191018_150336.jpg
    93.5 KB · Views: 162
  • 20191018_151342.jpg
    20191018_151342.jpg
    125.4 KB · Views: 179
Last edited:

Cortez

Bronco Guru
Joined
Jan 29, 2009
Messages
1,193
Nice idea on the storage box...will make a flat-mounted seat fit easily. What are your front seats going to be? Originals or aftermarket?
 
OP
OP
A

Audifan

Contributor
Full Member
Joined
Nov 25, 2018
Messages
250
Nice idea on the storage box...will make a flat-mounted seat fit easily. What are your front seats going to be? Originals or aftermarket?

Same as yours. From a 2017 wrangler. Just going to reupholster first.

Gonna mount straight to the sliders (hopefully using the 3 bolts on each side that are already welded to the bottom track.)
 
OP
OP
A

Audifan

Contributor
Full Member
Joined
Nov 25, 2018
Messages
250
Been awhile since I've made a post. Life got in the way of progress, but made a bit the past few days.

1. Ditched the stock radius arms in favor of some Duff Tuff extended radius arms, and welded brackets on instead of bolting.

2. Cut off stock shock tower as well as the front shock mount (welded to coil bucket) and added some WH Extended Shock towers (which I'm pretty sure are just a rebranded Ford Part)

...now I have to figure out how to measure for new shocks with the bronco in its current state...or maybe I just wait till it's all back together...I have no idea. LOL.

3. Installed Helwigg Front Anti-Sway Bar on front end.


Getting close to finishing all the welding and suspension stuff, then it'll finally be time to finish all the body and prep work.

Despite making progress, my list of mods and to-do items is not shrinking...which is concerning...sort of :cool:
 

Attachments

  • 20191127_140602.jpg
    20191127_140602.jpg
    82.7 KB · Views: 133
  • 20191127_140605.jpg
    20191127_140605.jpg
    97.8 KB · Views: 128
  • 20191127_140709.jpg
    20191127_140709.jpg
    98.1 KB · Views: 131
  • 20191127_140719.jpg
    20191127_140719.jpg
    96.9 KB · Views: 124
OP
OP
A

Audifan

Contributor
Full Member
Joined
Nov 25, 2018
Messages
250
got most of the bodywork finished now and after a bit more welding inside the tub, we'll finally be able to get her into Primer.

Also got my Protofab bumpers test fit with the winch, and everything fit like it was supposed to, so Bumpers are ready to head out for satin black powdercoat.

Next up is to fab up a mount for the rear seat using the info Cortez gave me and then drill holes in the tub for all 3 seats.

Fingers crossed we can start picking up speed now.

Really anxious to see paint on her again.
 

Attachments

  • 20191206_153059.jpg
    20191206_153059.jpg
    111.4 KB · Views: 122
  • 20191207_112213.jpg
    20191207_112213.jpg
    112.1 KB · Views: 133
  • IMG_20191207_095502_857.jpg
    IMG_20191207_095502_857.jpg
    139.4 KB · Views: 130
OP
OP
A

Audifan

Contributor
Full Member
Joined
Nov 25, 2018
Messages
250
No big updates on the Bronco itself yet, Xmas and new years threw a monkey wrench into getting stuff done.

I compensated by spending a bunch of money on new parts and other goodies...a few of the highlights include:

1. One piece glass power windows
2. Restomod Air Billet AC vents
3. Pioneer Touchscreen double din receiver
4. Duff Filler Panels
5. 10,000LB SB X20 winch
6. Rigid 5" LED Bumber lights front and rear
7. BroncoHut fiberglass door panels with speaker holes
8. WH lock and load center console

Of course they are just collecting dust for now along with all the other parts waiting to go back on.

The other thing I've been doing is playing around with dash layouts to try and find something that works for all the "stuff" I'm trying to cram into this EB.

My current favorite layout is pictured below, with all the rocker switches down on the WH Console front panel.

I have note done any real measuring yet, that is the next step to get everything marked where I want it, then make sure there's no issues behind the dash with where I want to place stuff.

On the dash is...
- 4 2.75 in AC vents
- Ignition (1)
- Lights (2)
- Wipers (3)
- Double DIN Touch Screen Receiver
- Electronic AC Controls
- 2 USB Power Ports (bottom of dash)
- 1 12V power port (bottom of dash)
- Dakota Digital Gauge Cluster
- Mini OLED transmission Temp Gauge (not pictured, but goes in top corner far left of dash)
- Glove box is moved over to accommodate roll bar


Down on the center console front plate is where I'm thinking of sticking all the rocker switches.

I'm also still contemplating a custom console that connects the dash to the WH center console...of course if I go that route then everything will likely change again
 

Attachments

  • IMG_20200104_203731_839.jpg
    IMG_20200104_203731_839.jpg
    101.5 KB · Views: 122
  • 20200105_150631.jpg
    20200105_150631.jpg
    93.9 KB · Views: 93
  • 20200105_150856.jpg
    20200105_150856.jpg
    64.5 KB · Views: 80

Cortez

Bronco Guru
Joined
Jan 29, 2009
Messages
1,193
Nice dash plan, now ju got some esplainin’ to do...what’s that blue beauty behind it?
 
OP
OP
A

Audifan

Contributor
Full Member
Joined
Nov 25, 2018
Messages
250
Nice dash plan, now ju got some esplainin’ to do...what’s that blue beauty behind it?

LOL. That blue beauty is the reason I can't paint my bronco Blue, like I had originally planned. But this is a Curacao Blue McLaren 570S Spyder we picked up Q3 last year and it's become my almost (weather permitting) daily driver. Although, once the EB is back together and the weather is warm, it'll be a toss up and will most likely depend on what the wife wants to drive :eek:


Believe it or not we had a custom blue color picked out for the bronco that was very similar to the Cavalry blue you went with. But we have a blue truck, and now a blue McLaren, so I decided we needed to diversify our vehicle colors a bit. So, I'm looking at some other color options.
 

Attachments

  • TANNER-LARSSON-MCLAREN.jpg
    TANNER-LARSSON-MCLAREN.jpg
    96.1 KB · Views: 197
OP
OP
A

Audifan

Contributor
Full Member
Joined
Nov 25, 2018
Messages
250
Finally got some primer on the body!

Still doing a bit of fabrication on some stuff, but guide coat is now on external body, doors, hood, and tailgate.

We also got the new door stops installed and tested with the doors. We wound up swapping them left side for right side and installing them the opposite way of how they came out of the donor. Not sure why, but it worked better on my doors than the other way.

Also fabbed up a metal cover to go over the mechanism to keep it protected...still have some tweaking to do to make it perfect.

Tacked in the WH passenger side storage piece to make sure that it was going to work the way I wanted with the seats and other stuff we're doing. And It looks good, I really like how it matches the drivers side. And so will be welding all the way in soon.

Still lots to do, but seeing primer instead of bare metal, makes me smile.
 

Attachments

  • 20200110_135214.jpg
    20200110_135214.jpg
    79.1 KB · Views: 126
  • 20200110_140348.jpg
    20200110_140348.jpg
    100.3 KB · Views: 132
  • 20200110_135232.jpg
    20200110_135232.jpg
    115.9 KB · Views: 121
  • 20200110_140359.jpg
    20200110_140359.jpg
    78.6 KB · Views: 140
OP
OP
A

Audifan

Contributor
Full Member
Joined
Nov 25, 2018
Messages
250
A bit more progress.

Drilled holes for front seat mounting points as well as for the center console.

Fabbed up the Rear seat mounting brackets to make the 2017 Wrangler fold and tumble seat work in the EB. (HUGE Thanks to CB member Cortez for figuring this out and sharing his plans with me. Saved me a TON of time.) And now that it all works, time to weld them up fully.

And also fit the Duff Tuff rear filler panel that will hide the body lift gap completely when combined with the protofab rear bumper.
 

Attachments

  • 20200127_164239.jpg
    20200127_164239.jpg
    96.3 KB · Views: 100
  • 20200127_164646.jpg
    20200127_164646.jpg
    96 KB · Views: 99
  • 20200127_164324.jpg
    20200127_164324.jpg
    77.5 KB · Views: 90
  • 20200127_164253.jpg
    20200127_164253.jpg
    61.7 KB · Views: 83
  • 20200127_164329.jpg
    20200127_164329.jpg
    101.1 KB · Views: 96
  • 20200127_164840.jpg
    20200127_164840.jpg
    119.4 KB · Views: 104
Last edited:
OP
OP
A

Audifan

Contributor
Full Member
Joined
Nov 25, 2018
Messages
250
Finally got some paint on!

Finally made some progress and even more exciting got some paint on the tub!!

1. We fabbed up some attachments to tie the roll cage into the frame. So now on 6 main points on the cage bolt through the tub into welded arms that are tied into the frame. In the picture they are just tacked on, but now they are welded on solid.

2. Coated the inside of the tub with Al's HNR Liner, which is a sprayable heat and sound ceramic coating. This goes down before we do the bedliner over the top.

3. FINALLY. Painter shot some color on the tub. I decided to go with Ford Lead Foot Gray instead of the lighter Nardo Gray I had planned on. And I'm glad I did. Its Dark, but still pops. We went with Base+Clear instead of a urethane as well.

Can't wait to get the rest of it painted and back in one piece, so we can get on with the million other things that still need to be done.
 

Attachments

  • 20200306_142248.jpg
    20200306_142248.jpg
    101.1 KB · Views: 114
  • 20200306_142237.jpg
    20200306_142237.jpg
    93.9 KB · Views: 118
  • 20200228_153348.jpg
    20200228_153348.jpg
    99.5 KB · Views: 101
  • 20200228_153351.jpg
    20200228_153351.jpg
    111.8 KB · Views: 104
  • 20200217_151009.jpg
    20200217_151009.jpg
    62.6 KB · Views: 105
  • 20200217_150955.jpg
    20200217_150955.jpg
    71.1 KB · Views: 108
  • 20200306_142456.jpg
    20200306_142456.jpg
    87 KB · Views: 99
Top