Community
Buy / Sell


Bronco Tech
3 Arm Wiper Setup
Fix Motor Mount
Roll Cage Braces
Throttle Body 65mm
Wheel Alignment
Heat Riser Replacement
Vent Window Repair
Center Console Mount
Straighten Bumper
Ford 6R80 6 spd
More Tech...
Fix Motor Mount
Roll Cage Braces
Throttle Body 65mm
Wheel Alignment
Heat Riser Replacement
Vent Window Repair
Center Console Mount
Straighten Bumper
Ford 6R80 6 spd
More Tech...

-
Welcome to ClassicBroncos! - You are currently viewing the forums as a GUEST. To take advantage of all the site features, please take a moment to register. It's fast, simple and absolutely free. So please join our community today!If you have problems registering or can't log into your account, please contact Admin.
You are using an out of date browser. It may not display this or other websites correctly.
You should upgrade or use an alternative browser.
You should upgrade or use an alternative browser.
The what did I get myself into 1971 Restomod - BUILD THREAD
- Thread starter Audifan
- Start date
Been awhile since I've posted here, as it's been a bit of a mess regarding the bronco. The last time I posted I was bringing her home from the painter with the understanding that I would buff out the clear. However, it turns out the painter/bodyman I hired who had the bronco for 6 months turned out to be a complete douchebag.
He raped the bronco. Heat warped the metal on the doors, front fenders and inner fenders with a grinder and sandblaster (even though I paid him to chemically strip). Waves and grinder marks in all the metal.
Paint (both base and clear) had more dirt in it than the ground, inconsistent coverage, drips and runs all over the place, dog hair under the clear . It was a mess.
He has zero desire to fix or make right and said he'll just declare bankruptcy if I take him to court.
At that point there was nothing to do but strip it down and redo everything.
The doors and front fenders were a loss in that they would require a ton of bondo to make nice, and I'm not a fan of bondo.
So, we bought new doors front fenders and inner fenders from WH and are in the process of redoing the bodywork.
He raped the bronco. Heat warped the metal on the doors, front fenders and inner fenders with a grinder and sandblaster (even though I paid him to chemically strip). Waves and grinder marks in all the metal.
Paint (both base and clear) had more dirt in it than the ground, inconsistent coverage, drips and runs all over the place, dog hair under the clear
He has zero desire to fix or make right and said he'll just declare bankruptcy if I take him to court.
At that point there was nothing to do but strip it down and redo everything.
The doors and front fenders were a loss in that they would require a ton of bondo to make nice, and I'm not a fan of bondo.
So, we bought new doors front fenders and inner fenders from WH and are in the process of redoing the bodywork.
Attachments
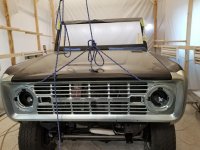
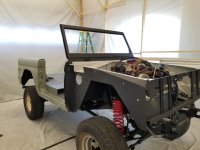
Here is where we stand right now.
Body off the frame (Again)
Everything sanded and in primer
Removed the old inner fenders
While the body is off, gonna do some more work on the frame and remove the C6 transmission and replace with an AOD or 4R70.
Body off the frame (Again)
Everything sanded and in primer
Removed the old inner fenders
While the body is off, gonna do some more work on the frame and remove the C6 transmission and replace with an AOD or 4R70.
Attachments
- Joined
- Nov 3, 2003
- Messages
- 49,379
Man, one thing after another to add time to the project. And money!
Sorry to hear about the poor thought process when it comes to blasting. Many a perfectly good door skin, hood and hard top panel have been ruined by blasting. Not to mention even grilles! Not sure what they were thinking, but even though it is doable if you're careful, you have to be that extra careful or just don't do it.
When in doubt... Do what the customer requested in the first place!
Paul
- Joined
- Mar 8, 2007
- Messages
- 81,983
Sorry to hear that... 
Been awhile since I've posted here, as it's been a bit of a mess regarding the bronco. The last time I posted I was bringing her home from the painter with the understanding that I would buff out the clear. However, it turns out the painter/bodyman I hired who had the bronco for 6 months turned out to be a complete douchebag.
He raped the bronco. Heat warped the metal on the doors, front fenders and inner fenders with a grinder and sandblaster (even though I paid him to chemically strip). Waves and grinder marks in all the metal.
Paint (both base and clear) had more dirt in it than the ground, inconsistent coverage, drips and runs all over the place, dog hair under the clear. It was a mess.
He has zero desire to fix or make right and said he'll just declare bankruptcy if I take him to court.
At that point there was nothing to do but strip it down and redo everything.
The doors and front fenders were a loss in that they would require a ton of bondo to make nice, and I'm not a fan of bondo.
So, we bought new doors front fenders and inner fenders from WH and are in the process of redoing the bodywork.
Thanks guys. yep, speed bump for sure, but still getting after it.
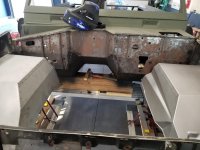
We got the old inner fenders cut out, and the new Drivers side inner fender welded in.
WH was out of stock on the passenger fender and still waiting on Toms to ship the one I ordered last week.
I also touched up the raptor liner on the underside of the body, and got the official "looks good dad" certification from my 4 year old son who decided he needed to "check things out".
Attachments
Got the other inner fender welded in finally on the passenger side. This one took a bit of finagling to get to fit right.
Also something of note regarding inner fenders. Toms and WH have very different products when it comes to inner fenders.
The WildHorse Inner fenders are very well made and sturdily constructed with very clean and strong spotwelds. Unfortunately they were out of stock on the passenger side Inner fender so I had to source it elsewhere.
I ordered the Passenger side inner fender from Toms and they shipped it quick and with no damage, but the actual product while still serviceable was not nearly as nice as the ones from WH. It was very flimsy with sloppy and weak spot welds, many of which broke during normal handling. It was fixable and once welded in does what it's supposed to.
Just and FYI, if you need inner fenders, buy them from Wild Horses.
Attachments
Been a bit slow on the progress as work and packing up to move has gotten in the way.
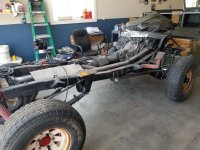
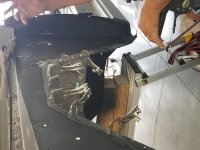
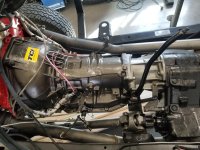
However some progress is being made now... The chassis is at the shop getting some transmission work done as well as replacing the brake lines with all new gear.
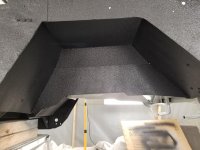
Also started working on the sound deadening and insulation in the out of the way areas, so that later I only have to do the wheel wells and the floor and tedious part of the process will be done.
Still debating if I want to continue the foam 2nd layer down onto the floor, or just leave it with the normal sound deadener.
Attachments
Looks good so far!
Got my roll bar, rack, and bumpers back from Glenn Lee, A fellow CB brother after he powdercoated them satin black and they look outstanding.
Also installed and prewired all the lights for the rack and added deutsch plugs instead of the crappy normal, non weatherproof plugs I had previously.
Also installed and prewired all the lights for the rack and added deutsch plugs instead of the crappy normal, non weatherproof plugs I had previously.
Attachments
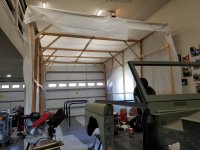
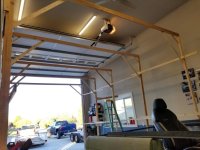
Today we framed up our temporary paint booth and started hanging the plastic.
We still need to enclose the two ends, hang the lights and plumb in the negative air machine.
But won't be long till we can FINALLY shoot some primer and get this project moving again.
We still need to enclose the two ends, hang the lights and plumb in the negative air machine.
But won't be long till we can FINALLY shoot some primer and get this project moving again.
Attachments
- Joined
- Mar 8, 2007
- Messages
- 81,983
Engine Block painted with all new seals and gaskets.
New TCI transmission installed and bolted to NP205.
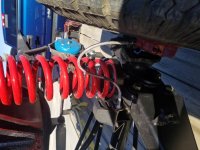
New brake lines throughout and new coil springs.
I can sense the anticipation... getting closer.
Made some major progress the last few days and she's FINALLY starting to look like something.
And I am learning a ton. All of this stuff is a first for me. Thank god my father in law and his brother know how to do all this stuff and are willing to teach me.
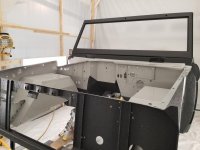
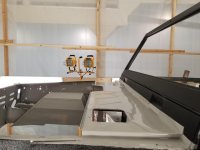
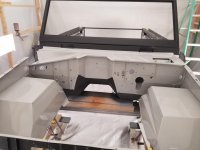
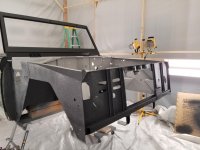
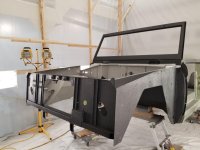
Last week we shot primer on the windshield and engine bay, sanded, re-primed and sanded again.
I decided to go with a black windshield frame and will also do door window frames black as well. And decided on doing the engine bay body colored.
So as of this evening...
- Windshield painted Jet Black and satin clear coated.
- Engine bay painted Chalk Gray and gloss clear coated.
- Full undercarriage, inner fenders , outer aprons, transmission tunnel and outside of core support Raptor lined black.
Tomorrow we are going to put the body back on the chassis and then we can start the rest of the body work.
Attachments
-
 20201127_182300.jpg151 KB · Views: 56
 -
 20201127_182235.jpg128.7 KB · Views: 59
 -
 20201127_181705.jpg84.4 KB · Views: 57
 -
 20201127_182314.jpg68.6 KB · Views: 62
 -
 20201127_181712.jpg74.1 KB · Views: 62
 -
 20201127_181632.jpg92.2 KB · Views: 58
 -
 20201127_181657.jpg89.5 KB · Views: 57
 -
 20201127_181641.jpg85.8 KB · Views: 70
Got side tracked with life, but have still been making some progress with the rebuild.
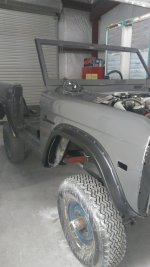
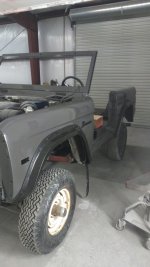
After getting the engine bay painted and the undercarriage raptor lined, we were able to put the body back on the chassis.
Went with a WH 2" billet body lift and all new bushings to replace the old body lift.
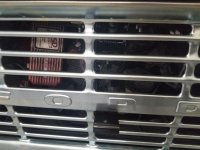
Then hung the new doors, fenders hood and grill...and then spent the next two weeks getting them to line up :-X
Attachments
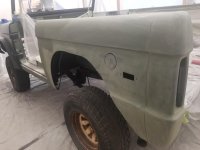
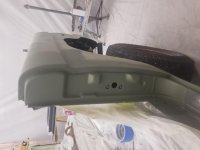
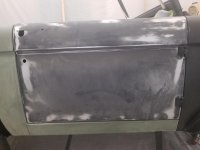
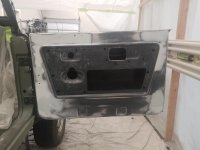
Next on the list was getting started on the doors...Brand new doors...still needed a TON of work getting rid of high spots and filling in the dents, rolls and spot welds.
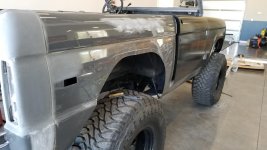
Got the drivers side door most of the way there and got a good start on the passenger door while the bondo was drying. Should have it finished tomorrow.
While we were at it we also skimmed the B pillars and the top bed rail to smooth it out.
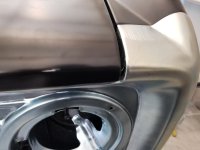
Finally, now that we've got the fenders fitting the way we want, we cut the fenders and installed the WH gorilla flares. (About broke my heart to cut those beautiful metal flares off, but my rear fenders were already cut, so I needed to match them)
Attachments
-
 20201226_192141.jpg65.9 KB · Views: 65
 -
 IMG_0406.jpg91.8 KB · Views: 80
 -
 20201212_152500.jpg79.9 KB · Views: 59
 -
 20201226_192342.jpg60.4 KB · Views: 61
 -
 20201226_192329.jpg52.7 KB · Views: 63
 -
 20201226_192158.jpg52.5 KB · Views: 63
 -
 20201226_192403.jpg66.6 KB · Views: 58
 -
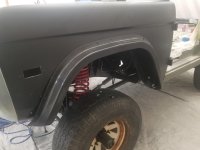 20201226_192244.jpg62.1 KB · Views: 57
Similar threads
- Replies
- 20
- Views
- 3K
- Replies
- 22
- Views
- 836


