


C6-203-205 Doubler
Tech article by admin and filed under Transfer CaseNow that I’ve covered the history behind my choice here are the details:
Note: I didn’t take very many pictures through the conversion and most of what I did were lost in a hard drive crash so I’ll try to explain as well as I can everything in detail and am providing what pictures I still have.
First I would need to obtain all of the parts. Here is the list I came up with:
1: C6 transmission with the short 4WD adapter that is 5 3/4″ long. I bought this in a local wrecking yard. The one I chose was from a 1989 Bronco that looked almost new inside. I paid $350 for the transmission plus another $120 or so to get a shift kit and off road torque converter. My brother put the shift kit in and checked the transmission over for free.
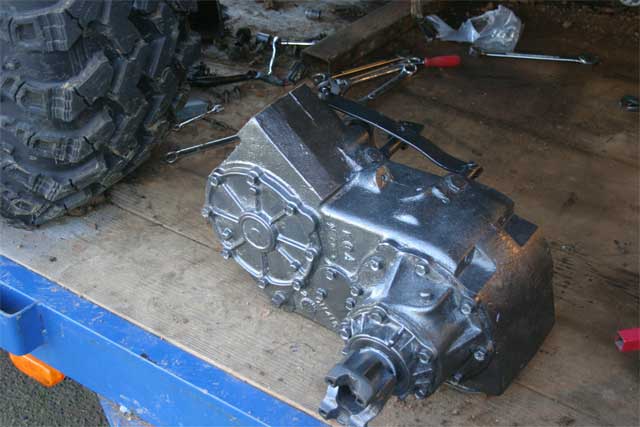
2: Ford NP 203 range box. (I chose the Ford one to avoid problems with spline counts) This was the hardest part to locate. I searched locally and finally called Stazworks and asked about other options. He happened to have one which he sold to me for $150. Shipping was steep but it came with the cover already set up with a fill plug in it.

NP 203 Range Box.

NP 203 cover with fill plug already installed prior to arrival.
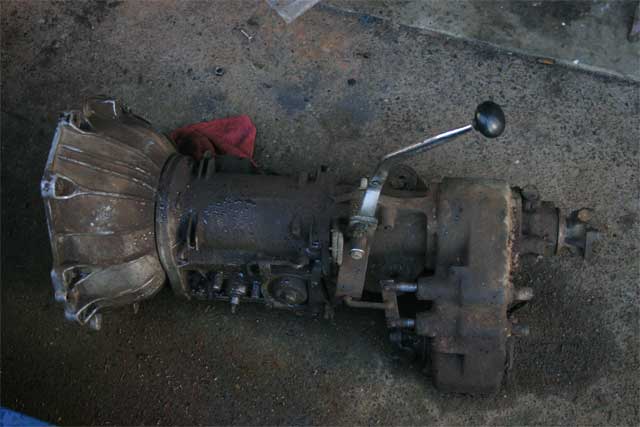
3: Ford NP 205 transfer case. I bought one in a local wrecking yard for $100 and ordered a seal kit for it from JBG at the same time. When I was digging through the cases to find the one I wanted I just happened to run across a Ford NP 203 that I could have bought for $100 if I hadn’t ordered the one from Stazworks already. When I asked why they said they didn’t have one the day before they said it wasn’t listed on their inventory.
NP 205 Transfer Case.
4: 203 to 205 Adapter kit (adapter and shaft). This I bought through Stazworks however it is actually built by Jed’s Machining. Cost is the same through either one which was $450. Shipping for this and the 203 range box was about $100 however it would have been a lot less without the heavy 203 range box included. I.E. Save some money and get it locally if you can. Note when I bought the adapter I was given a choice of having it come in 2 pieces so I could clock the NP 205 up where I wanted it before welding it together which is the option I chose.

NP 203 to NP 205 Adapter from Jed’s Machining.
5: Steel and hardware to build a triple stick. (One for the 203 and two for the 205 so I could twin stick it) I chose to hold off on this until I could mock it up in the garage. I did order a twin stick shifter boot from JBG though.
6: Steel for a new cross member. I also chose to hold off on this to see what it would require.
This left a couple of items to consider still. First is that the driveline lengths would change, second is that the exhaust would need to be changed. I did a bit of preliminary measuring and it looked like I may get by with simply swapping the front and rear driveline’s. On the exhaust it was a good excuse to put headers on. I went to EBay and grabbed a set of stock Mustang Shorty headers off a 95 Mustang. They are stainless steel to keep them from rusting out and at about $45 including shipping the price couldn’t be beat.
I ordered and obtained the first 4 items around thanksgiving and they all arrived and sat on the floor until late in January. I was putting off doing anything with them due to the weather because I would need to do the work on it outside. (My Bronco will not fit through my garage door) At that point I was left no choice though when I was in the middle a big mud hole and the C4 finally gave out.
Now that I had all of the major parts and a really compelling reason to go out in the cold I began by pulling the C4 and Dana 20 out of my Bronco. I pulled them out as a single unit and put them on the floor of the garage. While I was under there I cut the complete exhaust out in 4 pieces and put it in the garage as well with hopes of using it after the conversion. I also pulled the auxiliary fuel tank out because I had decided to install a larger tank in back and run a single tank instead.
The old C4 and Dana 20 from my Bronco.
Next I assembled the parts in the garage on the floor next to the old C4 setup. This gave me a good idea of the length I would be dealing with and enabled me to look at where I would locate the shifters. I chose to locate them on a single bolt in one of the bosses that were already in the C6 4WD adapter. I chose the front one which looked like it matched up pretty close to the original shifter location on the C4/D20 setup.

The two C6 adapter bolt bosses can be seen in the upper right area of this photo.
June 13th, 2010 at 12:22 pm
How is the rear drivehsaft angle on this? Do you have any measurements?
Thanks