• Just a reminder that you won't be able to start new posts or reply to existings posts in the Archive forum.

    This is where all the old posts go so they can still be used for reference and searched.
  • Welcome to ClassicBroncos! - You are currently viewing the forums as a GUEST. To take advantage of all the site features, please take a moment to register. It's fast, simple and absolutely free. So please join our community today!
    If you have problems registering or can't log into your account, please contact Admin.

Mass Confusion Build. After 2 1/2 years It started!!

OP
OP
71massbronco

71massbronco

Bronco Guru
Joined
Mar 13, 2011
Messages
1,321
I finally got my chrome valve covers out and decided to dress them up a little. I used the ford engine blue to highlight the debossed 302 insignia. I knew that I would have to peel the tape of before it went completely dry, but I shouldn't have waited as long as I did. I took it one of the covers, and pulled the paint. Should have stopped. Letting the other one cure more before I pull it off, hopefully it will fare better. When I touch it up and finish them off, they are going to look sweet. Or depending on the process and cost just take them to the local powder coater and get them done the right way.
 

Attachments

  • 100_2507.jpg
    100_2507.jpg
    88.8 KB · Views: 49
  • 100_2508.jpg
    100_2508.jpg
    110.9 KB · Views: 60
  • 100_2509.jpg
    100_2509.jpg
    117.7 KB · Views: 51
  • 100_2512.jpg
    100_2512.jpg
    84.5 KB · Views: 54
  • 100_2514.jpg
    100_2514.jpg
    55.4 KB · Views: 50
OP
OP
71massbronco

71massbronco

Bronco Guru
Joined
Mar 13, 2011
Messages
1,321
Today, I worked on getting the PS outer rocker attached, only had to do a little relocating for the pan vs. the inner rocker to get the outer rocker to line up. Also put an internal patch in. It's off a bit so I will have to go back and clean it up. Then got to work on laying in the firewall section. Had to clean up the tunnel lip a bit from the leftover old welds, then screwed it in to place. I am just waiting now for the windshield cross lower cowl, and a PS kick panel and I will get it all welded up and headed in the right direction.

I am concerned with the firewall, as it's position looks too high. I am going to wait until the afore mention pieces come in to weld anything together. It's easier to unscrew a screw then grind out a weld. With that said, my welding skills are improving as I had a heck of time freeing my outer rocker after a misalignment.

I also primed the outside, for no other reason then I was tired of looking at that ugly camo. It is slooooowly taking shape.
 

Attachments

  • 100_2539.jpg
    100_2539.jpg
    97.2 KB · Views: 90
  • 100_2538.jpg
    100_2538.jpg
    113.6 KB · Views: 96
  • 100_2536.jpg
    100_2536.jpg
    109 KB · Views: 95
  • 100_2532.jpg
    100_2532.jpg
    119.3 KB · Views: 85
  • 100_2531.jpg
    100_2531.jpg
    121.4 KB · Views: 95
  • 100_2530.jpg
    100_2530.jpg
    118.1 KB · Views: 87
  • 100_2529.jpg
    100_2529.jpg
    72.8 KB · Views: 84
  • 100_2528.jpg
    100_2528.jpg
    110.9 KB · Views: 92

dave67fd

Bronco Guru
Joined
Sep 24, 2010
Messages
2,863
Incredible build guy. Im PO'd i didn't see it before but read it all tonight. You will have to come get that top at least for an excuse to give me some much needed pointers.;D
 
OP
OP
71massbronco

71massbronco

Bronco Guru
Joined
Mar 13, 2011
Messages
1,321
Thanks Dave!

I don't know if I am qualified to give out any pointers yet. I am still figuring out things as I go along. I think my only helpful suggestion is-Don't throw anything away! Especially if you have never worked on one before, or don't have an extra one laying around. :)

I am taking a look at my schedule so i can get up north soon.
 

tasker

Contributor
all knowing of nothing
Joined
Jun 2, 2006
Messages
20,849
Loc.
NH
really coming along nicely.....we'll be seeing that in May i assume?
 
OP
OP
71massbronco

71massbronco

Bronco Guru
Joined
Mar 13, 2011
Messages
1,321
Randy, THAT is the goal.It may be in primer, but hopefully there. I think I am going to rename it "Crack-a-lackin".
 
OP
OP
71massbronco

71massbronco

Bronco Guru
Joined
Mar 13, 2011
Messages
1,321
Painted stock exhaust manifolds and started on the grill. Just goes to prove there IS some perty metal under that thar ugly camo. And a hint of a past fender bender too.;D
 

Attachments

  • 100_2544.jpg
    100_2544.jpg
    115.9 KB · Views: 55
  • 100_2550.jpg
    100_2550.jpg
    108.7 KB · Views: 57
  • 100_2546.jpg
    100_2546.jpg
    60.8 KB · Views: 57
OP
OP
71massbronco

71massbronco

Bronco Guru
Joined
Mar 13, 2011
Messages
1,321
CSI Massachusetts!

Hence the name Mass Casualty, right?(That's going to change soon.)Maybe to Mass Confusion. Ha!

Just ordered my windshield cowl and parts, and Hurst Shifter transmission tabs.(Merry Christmas to me!) :)
Ohhhh, now the long wait for the big brown van to arrive. :(
 
OP
OP
71massbronco

71massbronco

Bronco Guru
Joined
Mar 13, 2011
Messages
1,321
Another Craigslist score. I like these seats for four reasons,
1. They were $50
2. They match the look of the Bronco and the stock rear seat.
3. They were bought locally so I didn't have to travel to timbucktoo for the great deal.
4. They were $50. :)
 

Attachments

  • 100_2551.jpg
    100_2551.jpg
    99.6 KB · Views: 78

dave67fd

Bronco Guru
Joined
Sep 24, 2010
Messages
2,863
Not that it matters much, just curious what they came out of? They look in nice shape.
 
OP
OP
71massbronco

71massbronco

Bronco Guru
Joined
Mar 13, 2011
Messages
1,321
Came out of 1990 mustang GT I assume a convertible because of the shoulder clips. They aren't bad, but the drivers side foam is pretty tired and there are a couple of burn marks on the passenger's seat. They will get my by until I get them recovered.
 
OP
OP
71massbronco

71massbronco

Bronco Guru
Joined
Mar 13, 2011
Messages
1,321
I finally got to cutting out a floor pan from my stock. Had to be really careful because I had to cut out alot of cancer on the firewall. I was going to get ballsy and try to do it all in one piece. I opted for one small attachment that ramps down the PSide, then make one long pan.

I was doing pretty good, but screwed up a measurement. My motto should be measure three times, bend once. I ended bending the pan four inches too short for the firewall. Forgot to take into account the four inch bend in the back.%) Got that straightened out and everything laid down nicely. Will weld it up tomorrow and get the other pan cut.

You may notice that my bend towards driverside is a off the line drawn. The pan widens out so I had to bend at an angle. The only thing I forgot to take into account is a small triangular section left open. Not too wild about that, so i will weld in filler there.
 

Attachments

  • 100_2590.jpg
    100_2590.jpg
    94.2 KB · Views: 88
  • 100_2597.jpg
    100_2597.jpg
    116.6 KB · Views: 74
  • 100_2596.jpg
    100_2596.jpg
    110.7 KB · Views: 82
  • 100_2595.jpg
    100_2595.jpg
    117.2 KB · Views: 91
  • 100_2594.jpg
    100_2594.jpg
    122.6 KB · Views: 84
  • 100_2593.jpg
    100_2593.jpg
    92 KB · Views: 84
  • 100_2592.jpg
    100_2592.jpg
    122.2 KB · Views: 85
  • 100_2591.jpg
    100_2591.jpg
    96.4 KB · Views: 90
  • 100_2598.jpg
    100_2598.jpg
    60 KB · Views: 86
  • 100_2583.jpg
    100_2583.jpg
    130.5 KB · Views: 91
  • 100_2580.jpg
    100_2580.jpg
    115.2 KB · Views: 85

Stutsmo

Contributor
Bronco Guru
Joined
Jan 24, 2009
Messages
2,549
Your floors look like what I did on my 67 build. Except your doing more bends than I did. Nice Job!
 
OP
OP
71massbronco

71massbronco

Bronco Guru
Joined
Mar 13, 2011
Messages
1,321
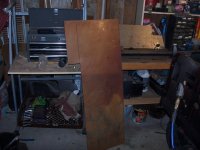
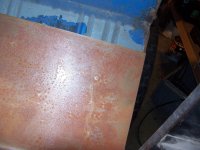
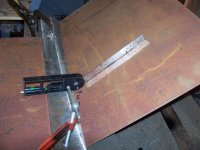
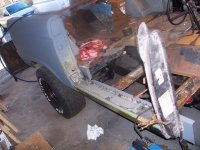
I am going to take the pan out and see if a friend of mine who runs a machine shop can bead roll the pans for me. I am going to cut out the DS pan fit it, then take it down to him.

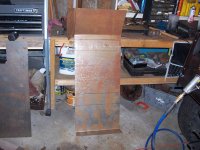
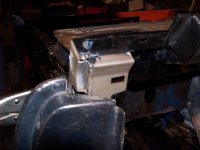
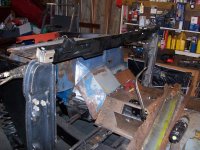
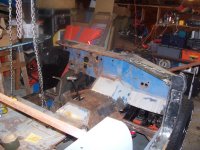
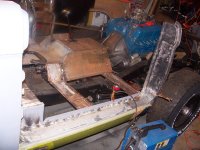
UPS came and I rushed out to the garage and opened the box and started assembly immediately. Had to dig out the old lower cowl section to make sure that I attached it to the right part of the post. I really need to cut out that PS Kick panel so I can attach the other post and lock that cowl in. Had to grind some of the end pieces to square them up.

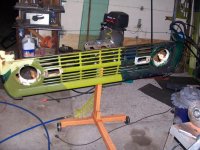
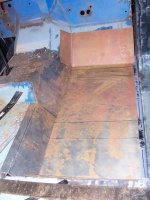
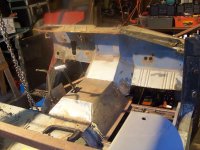
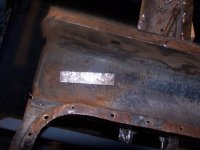
Next step after that is the section that is on top of the firewall. Was going to keep the old and just weld up new metal where the rust was. That is going to change "since I'm there". Thinking about taking out the air ducts and making it a straight piece like some mods have done.

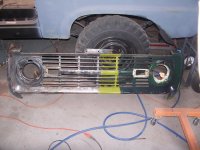
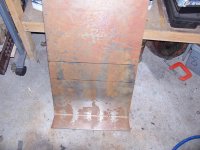
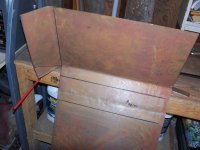
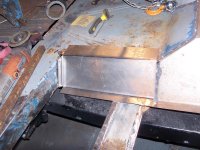
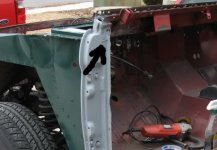
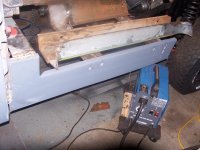
I'm not sure how that horizontal front piece attaches to the cowl frame. My old one was so gunked up with bondo and rust from an accident not sure if it was done correctly.The reason that I put it on the inside is whoever did the repair before replaced this post and put this on the INSIDE. Just goes to show me that I can't trust what's there. Man I just learned a lesson.

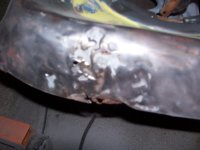
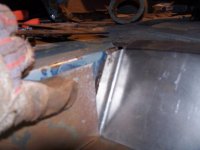
Edit:Ok, after a couple hours of searching, I know what I did wrong. The downward tab goes on the outside of the doorpost and rests against the inner lip. This was driving me crazy. I just learned a lesson, whoever did a repair on the cowl, put the tab on the inside, so that's what I followed. Guess it worked, but man this was making things hard! I know that it looks like it is tacked in, but that is from a spacer I put in there. The frame is just resting on the posts.
 

Attachments

  • 100_2602.jpg
    100_2602.jpg
    77.7 KB · Views: 96
  • 100_2605.jpg
    100_2605.jpg
    72.1 KB · Views: 103
  • 100_2604.jpg
    100_2604.jpg
    141.5 KB · Views: 117
  • cowlmeasurement3.JPG
    cowlmeasurement3.JPG
    30.9 KB · Views: 117
Last edited:

Mike Hewett

Sr. Member
Joined
Mar 1, 2004
Messages
358
I may be seeing things or simply wrong, but it looks like your door posts may be too far in, or too far towards the center of the bronco. I say that because when I installed my replacement door posts there was a large open hole at the top where yours looks like it is covered up by the cowl.

Just thought I would mention it in case they are too far in???
 
Top