• Welcome to ClassicBroncos! - You are currently viewing the forums as a GUEST. To take advantage of all the site features, please take a moment to register. It's fast, simple and absolutely free. So please join our community today!
    If you have problems registering or can't log into your account, please contact Admin.

migs Bronco Barn - a chronicle of what's happening at the new place

tasker

Contributor
all knowing of nothing
Joined
Jun 2, 2006
Messages
21,019
Loc.
NH
Pete, it's probably done and just doesn't want to tell me just yet :p
 
OP
OP
migs

migs

Sponsor/Vendor
Bronco Guru
Joined
Nov 12, 2011
Messages
1,361
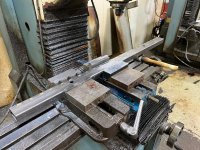
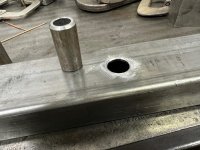
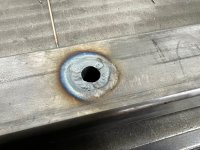
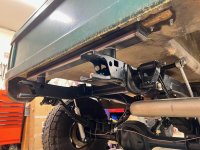
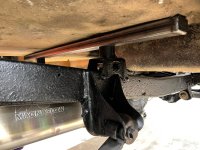
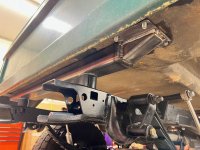
Well, after a ton of measuring, repositioning and checking body parts fit over and over, I finally figured out exactly(hopefully) where the tub needs to be and was ready to make those body mounting crossmembers. Started on those yesterday, milled out some holes in the tubing to weld in steel sleeves through where the body mount bolts go. Capped the ends and will tie into the roll bar mounting plates underneath once I get these up in place under there.
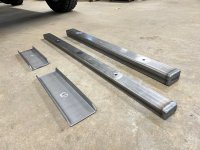
The two long tubes are for the middle and rear of the tub and the bent up C channel like parts are to help stiffen the tub under the front floor board sections.

IMG_2956.jpg IMG_2957.jpg IMG_2958.jpg IMG_2959.jpg IMG_2964.jpg IMG_2965.jpg

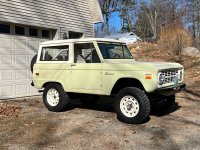
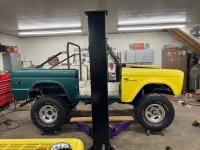
Oh, and earlier this week my ride came out of winter hibernation. so many ideas brewing what to do to it....:unsure: If there's anyone out there that wants to trade me large amounts of $$$ to keep me from further "modifying" it... better speak up now.:cool:


IMG_2936.jpg
 

Schloer2

Full Member
Joined
Mar 9, 2012
Messages
257
Oh, and earlier this week my ride came out of winter hibernation. so many ideas brewing what to do to it....:unsure: If there's anyone out there that wants to trade me large amounts of $$$ to keep me from further "modifying" it... better speak up now.:cool:

Looks perfect as is - you are obviously very skilled and have a great eye! If I hadn’t just purchased my ‘71 I would be very tempted…


Sent from my iPhone using Tapatalk
 

bronco1017

Sr. Member
Joined
Mar 22, 2010
Messages
547
Well, after a ton of measuring, repositioning and checking body parts fit over and over, I finally figured out exactly(hopefully) where the tub needs to be and was ready to make those body mounting crossmembers. Started on those yesterday, milled out some holes in the tubing to weld in steel sleeves through where the body mount bolts go. Capped the ends and will tie into the roll bar mounting plates underneath once I get these up in place under there.
The two long tubes are for the middle and rear of the tub and the bent up C channel like parts are to help stiffen the tub under the front floor board sections.

View attachment 921210 View attachment 921211 View attachment 921212 View attachment 921213 View attachment 921214 View attachment 921215

Oh, and earlier this week my ride came out of winter hibernation. so many ideas brewing what to do to it....:unsure: If there's anyone out there that wants to trade me large amounts of $$$ to keep me from further "modifying" it... better speak up now.:cool:


View attachment 921220
Wow! Amazing work. That large lad is one lucky boy.
 
OP
OP
migs

migs

Sponsor/Vendor
Bronco Guru
Joined
Nov 12, 2011
Messages
1,361
Well…may wait another year or so before making any drastic changes, we’ll see, still have some other ideas to implement this year though.

But I’ll tell ya…this fiberglass stuff don’t take to bending and welding too well…at least not like what I’m used to:LOL:

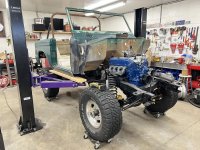
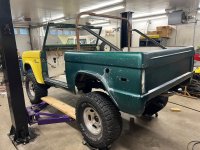
Working on the tub mounting now. After a bit of cleaning and organizing the shop to be able to get it on over to the lift, it’s up again.
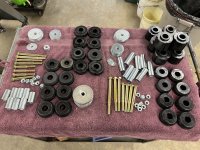
Should be able to get it right with the assortment of body mount hardware on hand….
IMG_2997.jpeg IMG_2994.jpeg IMG_2991.jpeg IMG_2996.jpeg
 
OP
OP
migs

migs

Sponsor/Vendor
Bronco Guru
Joined
Nov 12, 2011
Messages
1,361
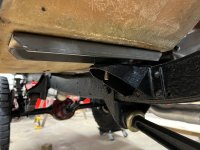
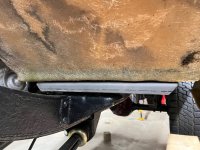
Put the new cross members up in place to check fitment and adjust things as necessary. At this point I had some other components to fit in place on the ends of the rear cross member that will tie it into the rear roll bar down tubes. I tacked those up in place so it could then be removed as one piece to finish welding.
The middle crossmember will stay as is as just a brace and support for the body, it sits further forward of the roll bar main hoop plates so I will instead make another piece to tie the main hoop down tubes together underneath and over the frame.
The front floor board brackets I made really added some much needed stiffness, took a lot of the flexing out. I used some spacers on top of a stock height body mount bushing to find the correct amount of spacing needed, and now I will mill down the integrated 1" body mount bushing and sleeve to match that dimension.
IMG_2999.jpg IMG_3001.jpg IMG_3002.jpg IMG_3003.jpg IMG_3004.jpg

And here is the rear cross member with the roll bar support plates welded on.

IMG_3005.jpg IMG_3007.jpg IMG_3008.jpg
 
OP
OP
migs

migs

Sponsor/Vendor
Bronco Guru
Joined
Nov 12, 2011
Messages
1,361
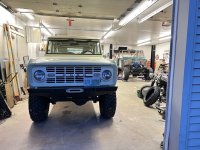
And rechecking fit of the front fenders with a core support in place. Everything looks pretty close and I'll be able to shim as necessary upon final mating of the tub to frame. You can see it sits a little high in the rear, but that's good as the rear springs are still pretty new and will settle, plus there is very little weight back there right now.

IMG_3009.jpg IMG_3010.jpg IMG_3011.jpg IMG_3012.jpg IMG_3013.jpg
 
OP
OP
migs

migs

Sponsor/Vendor
Bronco Guru
Joined
Nov 12, 2011
Messages
1,361
If they're bright yellow...then they're not mine 😁
 
OP
OP
migs

migs

Sponsor/Vendor
Bronco Guru
Joined
Nov 12, 2011
Messages
1,361
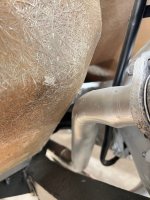
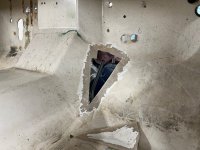
Did a little more this evening. Needed to dent, or cut and weld the firewall for some exhaust clearance...but wait, it's fiberglass!😲

Here's the close hot pipe infringement we're talking about:
IMG_3014.jpg

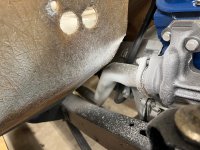
So to keep from needing a 3" body lift with this tub(trying to keep it as low as possible even with it's wonky floors and dimensions) Let's try cutting and welding some fiberglass!

The cut part was pretty easy...though dusty.
IMG_3029.jpg IMG_3030.jpg IMG_3031.jpg

What I did was turn the cutout piece upside down, or inside out i suppose depending how you look at it, and used masking tape to hold it in place and to make a "mold" in the void, then glassed it in. Next will be to remove all the tape and give the engine compartment side the same treatment.

IMG_3032.jpg IMG_3033.jpg IMG_3034.jpg IMG_3035.jpg
 

wsager

Full Member
Joined
Dec 3, 2014
Messages
334
Looking good. I have the same body, never installed. What do you figure the body lift will end up being? I was contemplating doing the same thing with sub-structure to tie the cage and seats into. Maybe rockers too.
 
Top