OP
OP
- Joined
- Nov 12, 2011
- Messages
- 1,376
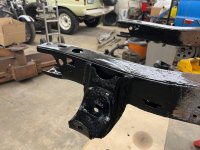
Yes, used one on each side of that frame raildid you make that patch ??


Yes, used one on each side of that frame raildid you make that patch ??


And Randy says he does it all with "Simple Green"??? Nice work migs!!!Caution, wet paint!
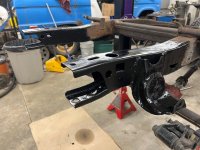
Put a little satin black down to start sealing things up. I still have a couple small rust issues to deal with a little further up the frame but wanted to get a head start on this in case I need to bolt the springs back on sooner than later.

NOT AS MUCH AS I AM!!!Really nice! I look forward to your next posts
There's probably still water in there! Heck, just last year when it was here I had to drill drain holes in the front bumper to drain trapped water out
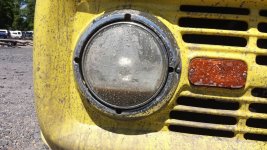
(now where's that headlight picture??)
Got to love that New England Rust! Looks great!
Really nice! I look forward to your next posts
I've got one here that is the epitome of New England rust... Looks can be deceivingGot to love that New England Rust! Looks great!


I'd be careful about opening the doors....it might fold in half!!!I've got one here that is the epitome of New England rust... Looks can be deceiving
View attachment 896541 View attachment 896542 View attachment 896543
She's had a hard life! More to come on this little red 74 when I'm ready to show and tell.....
Ben, Randy does do it all with simple green, that’s why it’s with Migs now…And Randy says he does it all with "Simple Green"??? Nice work migs!!!
Challenge accepted…Oh...no need to worry about that now Ben...
More to come on this one, but don't get too excited

That almost happened when we first winched it on the trailer for the ride homeI'd be careful about opening the doors....it might fold in half!!!
 Pulling from the front turned out to be ill advised……..