







Community

Buy / Sell



Bronco Tech
Fuel Tank Access Plate
3 Arm Wiper Setup
Fix Motor Mount
Roll Cage Braces
Throttle Body 65mm
Wheel Alignment
Heat Riser Replacement
Vent Window Repair
Center Console Mount
Straighten Bumper
Ford 6R80 6 spd
More Tech...
3 Arm Wiper Setup
Fix Motor Mount
Roll Cage Braces
Throttle Body 65mm
Wheel Alignment
Heat Riser Replacement
Vent Window Repair
Center Console Mount
Straighten Bumper
Ford 6R80 6 spd
More Tech...

-
Welcome to ClassicBroncos! - You are currently viewing the forums as a GUEST. To take advantage of all the site features, please take a moment to register. It's fast, simple and absolutely free. So please join our community today!If you have problems registering or can't log into your account, please contact Admin.
You are using an out of date browser. It may not display this or other websites correctly.
You should upgrade or use an alternative browser.
You should upgrade or use an alternative browser.
What have you done to your Bronco today?
- Thread starter Heus33
- Start date


- Joined
- Mar 8, 2007
- Messages
- 81,996
Put the twin stick knobs on the son in laws rig. Even though the silver paint marker floor pan marks was working just fine. Lol We up town now. And I picked up some 3/8 self tappers to get the skid plate attached.
no way..


- Joined
- Aug 14, 2018
- Messages
- 647
I got my engine back from Blueprint. somehow one of the small screws from my airbreather got sucked into the intake while it was running. it scored the cylinder, damaged the head and wiped a cam lobe. Blueprint rebuilt it under warranty. I told them this was obviously my fault, not a manufacturers defect, and they told me " everyone gets one" since they are only about 3 hours away I hauled it to them and back in my truck so it cost me nothing. amazing I don't really understand it, but I am happy to have my bronco back it took quite a while with the back order on parts, and I missed the Moab show, but I am still very pleased with Blueprint engines. I got the engine in over the weekend. working by myself. and last night I corrected a couple minor issues and had my first successful test drive. now to do some driving and let the snipers learn!!
Attachments


71 CA Bronco
Sr. Member
- Joined
- Nov 25, 2015
- Messages
- 764
I got my engine back from Blueprint. somehow one of the small screws from my airbreather got sucked into the intake while it was running. it scored the cylinder, damaged the head and wiped a cam lobe. Blueprint rebuilt it under warranty. I told them this was obviously my fault, not a manufacturers defect, and they told me " everyone gets one" since they are only about 3 hours away I hauled it to them and back in my truck so it cost me nothing. amazing I don't really understand it, but I am happy to have my bronco back it took quite a while with the back order on parts, and I missed the Moab show, but I am still very pleased with Blueprint engines. I got the engine in over the weekend. working by myself. and last night I corrected a couple minor issues and had my first successful test drive. now to do some driving and let the snipers learn!!
Now that is impressive. I think they will sell many more engines with that kind of customer service. When your on the fence making a decision on an engine these kind of stories put you over to their side for sure.
Nice to hear you have it back up and running.
- Joined
- Mar 8, 2007
- Messages
- 81,996
Awesome, so what is the plan for the old tires and rims?
really don't know yet brother.. but I'll keep you posted
- Joined
- Mar 8, 2007
- Messages
- 81,996
Well this bit of fun a while back, lead to needing one of these fancy gas tank skid plates. And when I installed the new bumpers, I mounted them (with the tubing going way inside the frame rails). So I go to mount it today and realized I have to go thru the old skid plate frame mount holes and drill into the tubing I inserted a while back. I need an inverted drill press...One step fwd, one step back.
no, 1 step forward, 3 steps back typically
- Joined
- Aug 14, 2018
- Messages
- 647
Well this bit of fun a while back, lead to needing one of these fancy gas tank skid plates. And when I installed the new bumpers, I mounted them (with the tubing going way inside the frame rails). So I go to mount it today and realized I have to go thru the old skid plate frame mount holes and drill into the tubing I inserted a while back. I need an inverted drill press...One step fwd, one step back.
can you fit a maglock drill in there?
Attachments


Ring and pinion was making noise. Took it out and the R&P was wore out bad. Not sure what I screwed up to do that but I built it about 12 years ago.
Put in a new Richmond gear, Strange N housing and Daytona pinion support. Hopefully good now.
Put in a new Richmond gear, Strange N housing and Daytona pinion support. Hopefully good now.

I ordered a set of Migs, Boomerang leaf spring shackles. And continued with the Explorer 5.0 tear down.

Installed the WH saginaw p/s pump bracket stiffing bolt. (In the head and then thru the pump and bracket). That was an easy way to brace the bracket that kept flexing on me.
Then did the easy way to drill thru the frame rail to change up the steering stabilizer mount bracket placement. Installed new WH steering stabilizer shock.
Then used that same idea to drill thru the WH skid plate, the frame and the tubing inside the frame rails. And then did the finial install of the skid plate. The OEM skid plate bolt holes were wallered out. That is why I had to drill new ones.
Noticed that the skid plate fell a little short on the front part (of the gas tank) and left the front edge of the gas tank exposed.
So I grabbed a spare piece of aluminium plating (that had a weird sticker on it) and got the rest of the tank protected easy enough.
Added some muffler turn downs/extensions to stop heat soaking my gas tank. Waiting on the darkness to finish the rock light install.
Then did the easy way to drill thru the frame rail to change up the steering stabilizer mount bracket placement. Installed new WH steering stabilizer shock.
Then used that same idea to drill thru the WH skid plate, the frame and the tubing inside the frame rails. And then did the finial install of the skid plate. The OEM skid plate bolt holes were wallered out. That is why I had to drill new ones.
Noticed that the skid plate fell a little short on the front part (of the gas tank) and left the front edge of the gas tank exposed.
So I grabbed a spare piece of aluminium plating (that had a weird sticker on it) and got the rest of the tank protected easy enough.
Added some muffler turn downs/extensions to stop heat soaking my gas tank. Waiting on the darkness to finish the rock light install.
Attachments


Oh wow that is a yield sign....I never noticed it. 3 of 4 rock lights just done. Had to call it quits for the night. I think I mounted the front ones to high, but the back one is low and puts more light on the axles/inboard tires.
So going to reposition and lower the front ones tomorrow.
So going to reposition and lower the front ones tomorrow.
Attachments


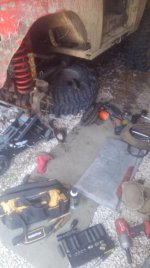
Well finishing up some rock light wiring clean up this am and look over and see this....WTH when did THAT happen? Which leads to all this, and then discovering just how bad it is. Short shaft ear is TOAST. So now Wild Horses has some money and I have some 4340 ChroMo axles w/CTM joints on the way.
Their description:
This 4340 ChroMo front axle kit comes with inner & outer axles for both left and right sides along with the CTM joints.
* Made from 4340 chromoly. Provides up to 50% increased strength over stock axles.
* Machined for full snap rings. C-clip snap rings are known to come off under high stress.
* 1.189" O.D. U-joints. Stock Bronco U-joint caps measure 1.063", the chromoly axles use the large O.D. caps for added strength.
They will be here Thursday and in they go as soon as the USP truck hits the drive way. Nomaly I would have the other side all torn apart and be ready. But in my hurry to get the dvrs side done, I put it in a little tight on the passenger side of the workport to be able to get the passenger side apart. Dammit.
I feel that a thursday night wrench fest is in my near future.
Their description:
This 4340 ChroMo front axle kit comes with inner & outer axles for both left and right sides along with the CTM joints.
* Made from 4340 chromoly. Provides up to 50% increased strength over stock axles.
* Machined for full snap rings. C-clip snap rings are known to come off under high stress.
* 1.189" O.D. U-joints. Stock Bronco U-joint caps measure 1.063", the chromoly axles use the large O.D. caps for added strength.
They will be here Thursday and in they go as soon as the USP truck hits the drive way. Nomaly I would have the other side all torn apart and be ready. But in my hurry to get the dvrs side done, I put it in a little tight on the passenger side of the workport to be able to get the passenger side apart. Dammit.
I feel that a thursday night wrench fest is in my near future.
Attachments




Last edited:


- Joined
- Mar 8, 2007
- Messages
- 81,996
Keep after it brother...
Installed the WH saginaw p/s pump bracket stiffing bolt. (In the head and then thru the pump and bracket). That was an easy way to brace the bracket that kept flexing on me.
Then did the easy way to drill thru the frame rail to change up the steering stabilizer mount bracket placement. Installed new WH steering stabilizer shock.
Then used that same idea to drill thru the WH skid plate, the frame and the tubing inside the frame rails. And then did the finial install of the skid plate. The OEM skid plate bolt holes were wallered out. That is why I had to drill new ones.
Noticed that the skid plate fell a little short on the front part (of the gas tank) and left the front edge of the gas tank exposed.
So I grabbed a spare piece of aluminium plating (that had a weird sticker on it) and got the rest of the tank protected easy enough.
Added some muffler turn downs/extensions to stop heat soaking my gas tank. Waiting on the darkness to finish the rock light install.
- Joined
- Mar 8, 2007
- Messages
- 81,996
Ring and pinion was making noise. Took it out and the R&P was wore out bad. Not sure what I screwed up to do that but I built it about 12 years ago.
Put in a new Richmond gear, Strange N housing and Daytona pinion support. Hopefully good now.
fingers crossed brother..


Comemonday71
Jr. Member
- Joined
- Jun 19, 2019
- Messages
- 138


Similar threads

- Replies
- 38
- Views
- 9K

- Replies
- 23
- Views
- 6K

- Replies
- 34
- Views
- 5K
- Replies
- 5
- Views
- 2K
