


Community
Message Forum
Photo Gallery
Event Calendar
Book Reviews
Bronco Wallpaper
Bronco FAQ
Link Back to CB!
Photo Gallery
Event Calendar
Book Reviews
Bronco Wallpaper
Bronco FAQ
Link Back to CB!

Buy / Sell


Bronco Tech
3 Arm Wiper Setup
Fix Motor Mount
Roll Cage Braces
Throttle Body 65mm
Wheel Alignment
Heat Riser Replacement
Vent Window Repair
Center Console Mount
Straighten Bumper
Ford 6R80 6 spd
More Tech...
Fix Motor Mount
Roll Cage Braces
Throttle Body 65mm
Wheel Alignment
Heat Riser Replacement
Vent Window Repair
Center Console Mount
Straighten Bumper
Ford 6R80 6 spd
More Tech...

Install the app
-
Welcome to ClassicBroncos! - You are currently viewing the forums as a GUEST. To take advantage of all the site features, please take a moment to register. It's fast, simple and absolutely free. So please join our community today!If you have problems registering or can't log into your account, please contact Admin.
You are using an out of date browser. It may not display this or other websites correctly.
You should upgrade or use an alternative browser.
You should upgrade or use an alternative browser.
Saginaw Pump on Explorer Serpentine
- Thread starter EricLar80
- Start date
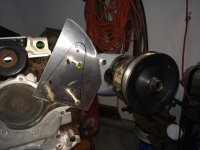
I FINALLY got around to test fitting the bracket into place on my 351W-based engine. Thought I had 7/16" bolt holes in the head, but they are actually 3/8", so I was only able to mock it up.
I could have mounted it another inch or two higher, but I wanted to make sure it would fit under any hood without a body lift (I have a fiberglass hood, and a 1" BL) and with whatever HD motor mounts (I have standard). Looks like there should be quite a bit of room to route the GTO radiator hose as well. I will need a need a longer belt since the pulley sits further out than before. It looks like the pulleys are lining up, but I am still crossing my fingers since I haven't put on the PS pulley yet.
Here you can see the fit as a whole, I'll have to get a better angle on the picture:

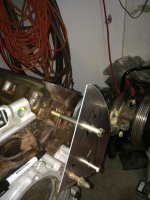
Plenty of room next to the fender-well; I was able to fit my hand between the return and the sheet metal:

Also, something I think would make any Explorer serpentine owner proud - plenty of wiggle room for the TFI connector. Previously, I had that perfect sweet spot, but now there is about a inch of room:

More to come soon...
Eric
I could have mounted it another inch or two higher, but I wanted to make sure it would fit under any hood without a body lift (I have a fiberglass hood, and a 1" BL) and with whatever HD motor mounts (I have standard). Looks like there should be quite a bit of room to route the GTO radiator hose as well. I will need a need a longer belt since the pulley sits further out than before. It looks like the pulleys are lining up, but I am still crossing my fingers since I haven't put on the PS pulley yet.
Here you can see the fit as a whole, I'll have to get a better angle on the picture:
Plenty of room next to the fender-well; I was able to fit my hand between the return and the sheet metal:
Also, something I think would make any Explorer serpentine owner proud - plenty of wiggle room for the TFI connector. Previously, I had that perfect sweet spot, but now there is about a inch of room:
More to come soon...
Eric
Last edited:
mp
Bronco Guru
Awesome. How do I get the 351W version?
Nice, but its still not high enough for full hydro guys with external reservoirs. If you are not running a hydraulic cylinder the Explorer pump is fine in stock form.
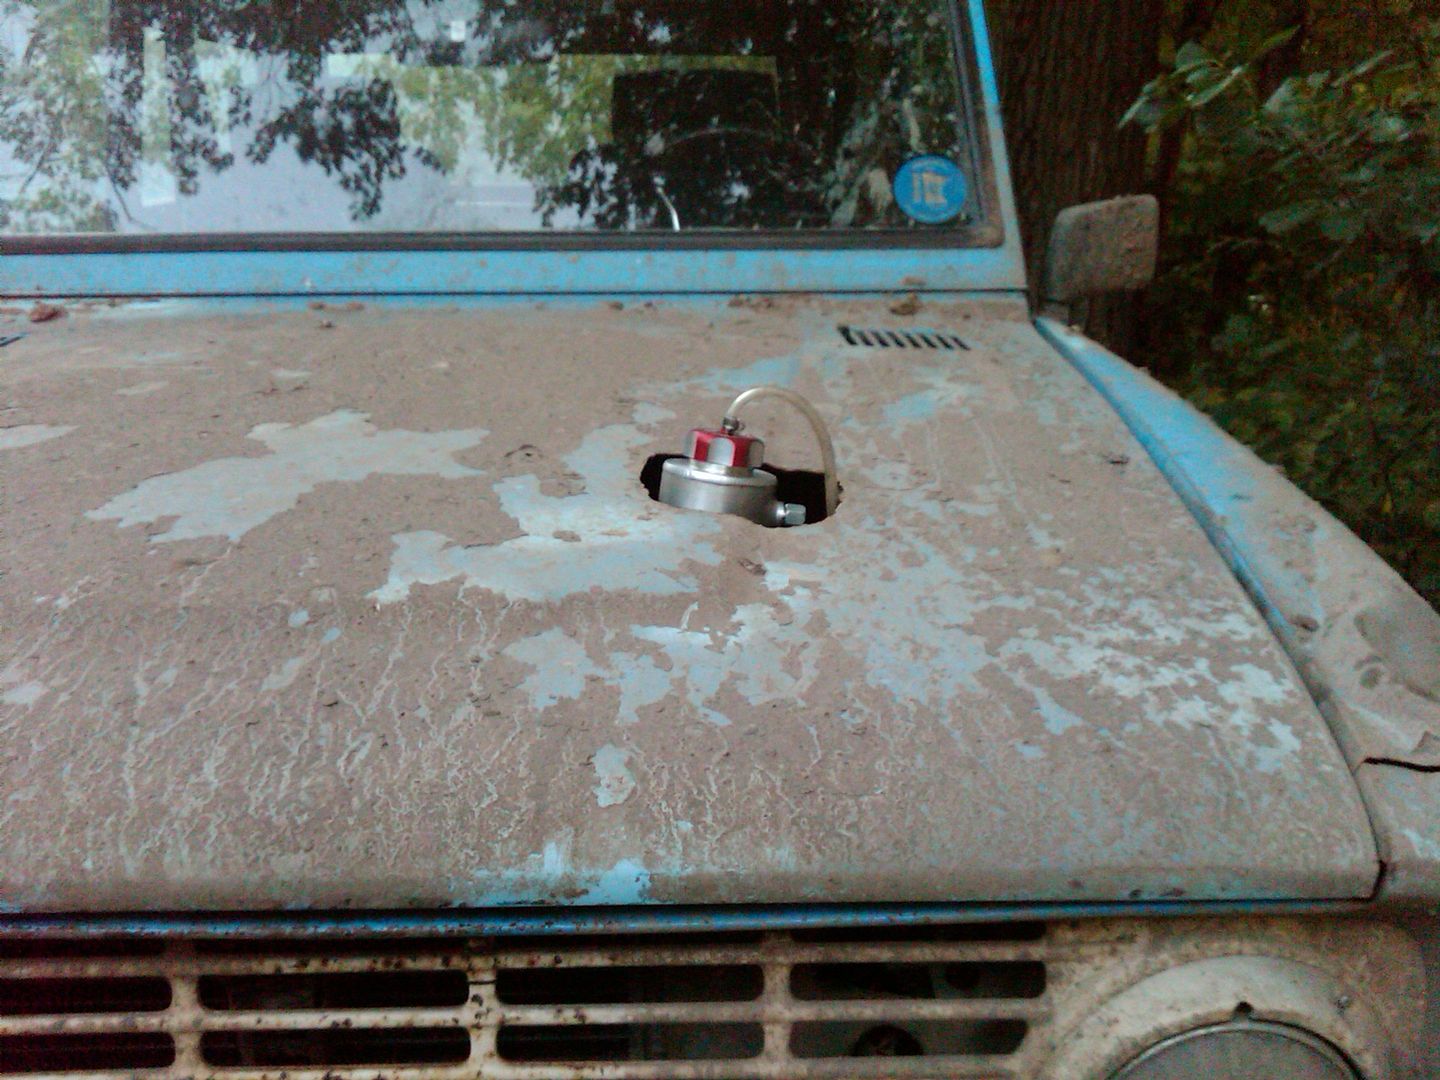
I suppose, but I am sure you know as well as I that there are solutions to the full hydro problem (images for ideas, below). I would say that the Explorer pump is adequate, but not great.

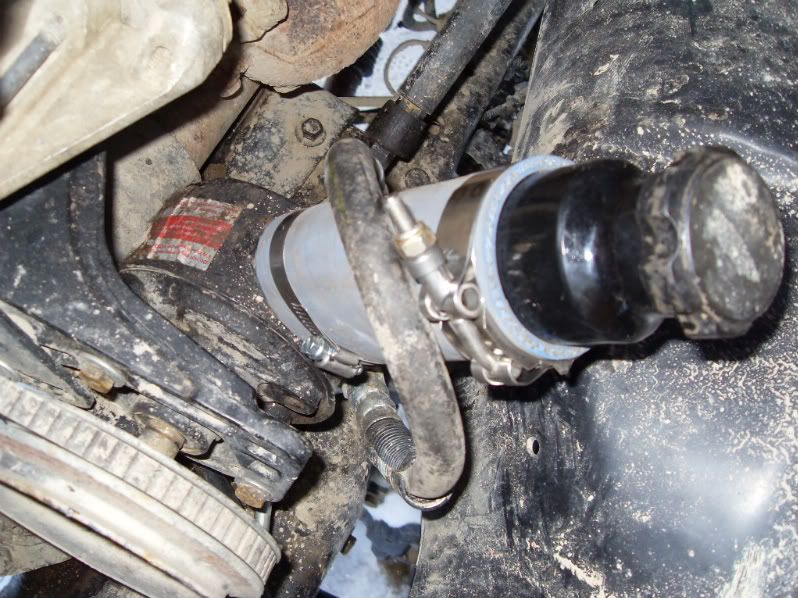
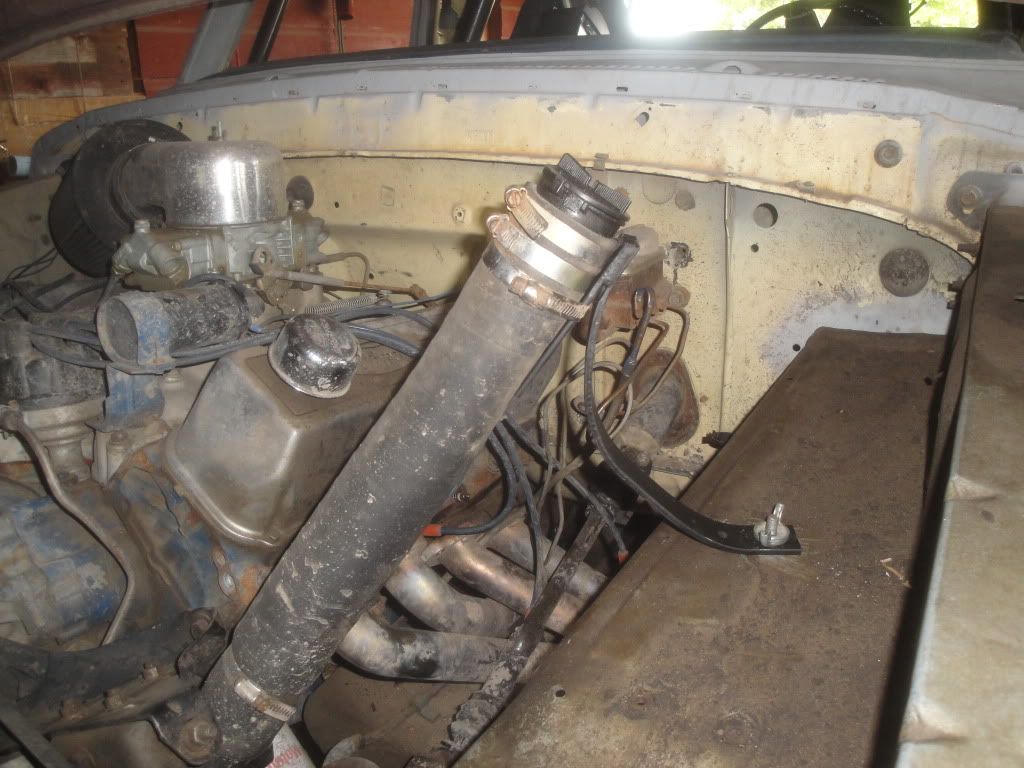

Eric
KyleQ
Bronco Guru
- Joined
- Apr 24, 2008
- Messages
- 5,480
Except none of those will clear the hood - lowering the pump WITH those mods would allow that, but it doesn't look like the pump was lowered via the mount much.
There is a reason I had to do this-

Looks really clean though - nice work. Its hard to tell, but maybe that pump setup is low enough...
There is a reason I had to do this-
Looks really clean though - nice work. Its hard to tell, but maybe that pump setup is low enough...
Oh, wow, how high does the reservoir have to be? My thought was that you could extend it out as tall/short as you wanted since you are just using a length of tubing, plus a 2nd cap attachment ring. Obviously that doesn't allow for a remote reservoir.
Based on your picture and looking at the radiator hose in relation to the pulley, I would say your pump is lower.
Anyway, I think it is in a good place for my purposes. There is quite a bit of room to lower the pump if someone decides to do so, especially if they dent or remove the inner fender, or tilt the pump slightly inward. There is a surprising amount of room above the steering gear, perhaps 3 or 4 inches.
Eric
KyleQ
Bronco Guru
- Joined
- Apr 24, 2008
- Messages
- 5,480
Oh, wow, how high does the reservoir have to be? My thought was that you could extend it out as tall/short as you wanted since you are just using a length of tubing, plus a 2nd cap attachment ring. Obviously that doesn't allow for a remote reservoir.
Based on your picture and looking at the radiator hose in relation to the pulley, I would say your pump is lower.
Anyway, I think it is in a good place for my purposes. There is quite a bit of room to lower the pump if someone decides to do so, especially if they dent or remove the inner fender, or tilt the pump slightly inward. There is a surprising amount of room above the steering gear, perhaps 3 or 4 inches.
Eric
Needs to be above and possibly forward of the pump - your setup is nice and clean though.
Very nice looking setup Eric. Have you tried the coil mount yet? Great idea.
Looks tight in there, but a slick spot (albeit a bit hot perhaps?) for mounting stuff up.
Paul
Yes and no. Unfortunately the bolt pattern I got online was not correct for my coil, so I need to retap the holes in a differet spot. It is definitely a tight area, but I think it will fit ok; I may point the coil wire up instead of sideways to buy some room. I have always tried to mount the coil on the engine since I don't like having the coil wire going to the fender. I haven't had any issues in the last 10 years, but this spot is really tucked in there.
Quick update: I got the 3/8" bolts and was able to get it fully tested in place. I opened one of the holes up slightly. Took it back off for a coat of paint. And will do final mount after it has some time to dry today.
Eric
broncokak
Bronco Guru
- Joined
- Jun 13, 2006
- Messages
- 3,969
Subscribed.... Great info.
I'm in the same boat Kyle is in. My Explorer pump seems to work fine as long as I'm moving but not so good on the trail when you need to make a hard turn with little movement. I was thinking of up grading the pum but am not sure what to go to. I don't have hydro assist steering (yet) but will be adding Hydoboost this spring.
I'm in the same boat Kyle is in. My Explorer pump seems to work fine as long as I'm moving but not so good on the trail when you need to make a hard turn with little movement. I was thinking of up grading the pum but am not sure what to go to. I don't have hydro assist steering (yet) but will be adding Hydoboost this spring.
I was able to get everything installed today and started the motor. Everything fit nicely, no leaks and the belt didn't jump off the pulley. I haven't been able to take it out for a drive yet and so I can't comment on the pump itself.


The pulley I ended up using for the saginaw is part number 14100597. You can find it on a ton of GM vehicles, but the easiest for me to spot with the saginaw is the early 90's S-10 truck. The Dayco replacement pulley is about an inch or so larger and I wanted the higher pulley speed at low RPM so I went with the aforementioned junkyard pulley.

Thanks for the support everyone! On to the next project...
Eric
The pulley I ended up using for the saginaw is part number 14100597. You can find it on a ton of GM vehicles, but the easiest for me to spot with the saginaw is the early 90's S-10 truck. The Dayco replacement pulley is about an inch or so larger and I wanted the higher pulley speed at low RPM so I went with the aforementioned junkyard pulley.
Thanks for the support everyone! On to the next project...
Eric

- Joined
- Nov 3, 2003
- Messages
- 49,233
I was able to get everything installed today and started the motor. Everything fit nicely, no leaks and the belt didn't jump off the pulley. I haven't been able to take it out for a drive yet and so I can't comment on the pump itself.
Wow! Nice to get that up and running Eric. And thinking positive, OF COURSE the belt didn't jump off! Confidence is high after looking at the way it's set up.
Can't wait to hear what you think about the new pump and smaller pulley.
Paul
- Joined
- Nov 3, 2003
- Messages
- 49,233
Here's my explorer bracket, I started out with the WH bracket and modified from there. I put the pump down low with the York above it.
Crikey Mark! You did some little fiddling with that didn't you? ;D
Looking pretty busy under that hood these days. But it all looks packaged in very well indeed.
Paul
Hey Eric. Did you happen to notice that you're just 4 days shy of the anniversary of starting this thread? Good timing. And a lot of work.
Looks like it was worth it.
Paul
Haha, no, I hadn't. Really, it doesn't feel nearly that long, but not too surprising... I must have been on a schedule without knowing it!
awesome project. when do you start selling the kit?
Well, I don't know that I will want to sell a kit, but I am actually considering posting the design open source, so anyone can make it. If I do make a kit, I will probably simplify the design some so it doesn't require welding.
Here's my explorer bracket, I started out with the WH bracket and modified from there. I put the pump down low with the York above it.
I like the setup; that must have taken a lot of patience.
Eric
casadejohnson
Bronco Alchemist
- Joined
- Jan 21, 2005
- Messages
- 3,587
The bracket keys off some holes in the head and holes in the block, on a 351 those holes moved.
You can just modify this bracket to work on a 351, but it will be up to you to do it.
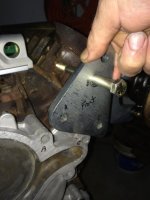
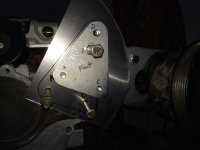
I got my Wild Horses Bracket this past Friday and started to get it mocked up on my "Spare" 5.8. The issue could be solved pretty easily with a little bit of welding but in the interest of keeping it clean in appearance and more importantly, keeping the idler pulley in alignment I'm getting a new bracket cut for the idler pulley. I mocked it up today out of scrap aluminum but I'll have the final one cut out of steel plate on the water jet. I hope I can get it back this week. Here are some pics of what I'm doing. My water jet guy has a minimum fee so I'm having a few of the 351w brackets cut. I'm going to need a second one for my next project anyway.
Attachments

Similar threads
- Replies
- 14
- Views
- 759
- Replies
- 17
- Views
- 1K
- Replies
- 5
- Views
- 2K