• Welcome to ClassicBroncos! - You are currently viewing the forums as a GUEST. To take advantage of all the site features, please take a moment to register. It's fast, simple and absolutely free. So please join our community today!
    If you have problems registering or can't log into your account, please contact Admin.

Dan Wheeler's 69 4R70W/Atlas Build Thread

markperry

Bronco Guru
Joined
May 8, 2009
Messages
4,175
Thanks! It's sweet on the inside, a little sour on the outside. ;D

257405005_UfH7k-M.jpg


257405053_74t4C-M.jpg


257405403_NWqCw-M.jpg


257405595_RzErU-M.jpg


A serious Trans Am fan will recognize that last pic shows the wrong bird for the 79 year but I prefer the older bird decal over the 79. Lots to be done still.
very cool! I love older cars and trucks...I own a 67 mustang and a 76 eb...but I love all the old ones ford,chevy,mopar
 
OP
OP
DanWheeler

DanWheeler

Bronco Guru
Joined
Nov 8, 2005
Messages
2,549
Loc.
Kirkland, WA
OK - the stock crossmember is a no-go. As OsideDave mentioned, you just can't clock it up far enough with the stock crossmember to get it out of the way.

I'll be building something like what OsideDave suggested:
http://classicbroncos.com/forums/attachment.php?attachmentid=128188&d=1238039127

Max angle WITH stock crossmember:
610519207_F4Z7v-M.jpg


Max angle WITHOUT stock crossmember:
619740864_nzca7-M.jpg


Stock 90s Ford Explorer front driveshaft on the rear:
619741209_Hxbwq-M.jpg


Lars, driveline length is 30" from U-joint center to U-joint center.

Driveline angle is 20 degrees. Not great, but any lower and my Atlas is hanging very far below the frame.

619740984_DkzcS-M.jpg


619741432_M3qLH-M.jpg

619741530_rWK7Z-M.jpg


619741341_YGzmL-M.jpg


Stock Ford Explorer front driveshaft seems to have more angle available then my Wild Horses driveshaft

619741661_W5SBC-M.jpg


Same 90s Ford Explorer works in front AND rear?!

619740599_Ymnpy-M.jpg


well it's really close. It's just a little too long in the front and maybe not quite long enough in the rear

front:
619740768_iMwZb-M.jpg


rear:
619750885_N5xmW-M.jpg


should make for a great $10 emergency trail spare though.
 

lars

Contributor
Been here awhile
Joined
Jun 29, 2001
Messages
3,194
Loc.
NorCal flatlands
Ooohhh yeah... I remember that crossmember issue myself now. I never paid too much attention to it since I was given an AA crossmember to use, that sidestepped the front driveshaft issue.

X2 on the driveshaft lengths. One driveshaft just about works as a spare. I'm at about 30" in back, running at about 17 degrees at the CV.

Speaking of which, I will be curious to see how your driveline holds up. My Bronco doesn't get driven a lot, ~5000 miles a year, but insofar as I don't commute by car much (mostly I ride a bicycle on the 3.5 dead-flat miles of bike path) it truly is my only driver. It sees lots of 70+ mph freeway miles. I'm getting about 5-6000 miles out of new rear driveshafts before the CVs & splines are toast. I'd love a Tru Hi9 but that's not happening, so next time I'll probably fork out for a 1 ton setup from High Angle Driveline. And yes, pinion angle, all the other stuff are correct. Been through all those things. It's the extended high speed stuff that kills it.
 
OP
OP
DanWheeler

DanWheeler

Bronco Guru
Joined
Nov 8, 2005
Messages
2,549
Loc.
Kirkland, WA
Crossmember finally complete

632010998_EKUhm-L.jpg


hangs a little low but not too bad.

now I just need to mount the Atlas, finish my exhaust, install the new radiator, install the transmission cooler, finish the new starter wiring, plug in and program the Baummanator and I should be ready to roll
 
OP
OP
DanWheeler

DanWheeler

Bronco Guru
Joined
Nov 8, 2005
Messages
2,549
Loc.
Kirkland, WA
ATLAS installed
632566649_w3rBR-M.jpg


it's a little tight next to the frame but not touching. About 1/4" away
632566997_sgRuH-M.jpg


clearance is good
632568141_CKxXz-M.jpg

632568550_MKBH4-M.jpg


shifters are in and work great
632567400_XLUKy-M.jpg

632567730_AZEYD-M.jpg


clocking angle is good
632567787_3JyBK-M.jpg


brand new tom woods driveshaft. Angle is about 18 degrees
632568840_tFzFC-M.jpg
 
OP
OP
DanWheeler

DanWheeler

Bronco Guru
Joined
Nov 8, 2005
Messages
2,549
Loc.
Kirkland, WA
Hurst ratchet shifter (modified to eliminate lockouts) is installed and working perfectly

637695882_G2wFw-L.jpg


637695897_ca3L8-L.jpg


Derale transmission cooler is mounted and wired up

637695993_vbFNY-M.jpg


637695955_oSZzx-M.jpg


637695944_S9cRp-M.jpg


The fan is setup as a pusher fan and vents out into the fenderwell. It is connected to a relay that is only live when the ignition is on.

I would have had the exhaust started by now but I had a problem with the Hedman headers. On SummitRacing.com it says the collector size was 2.5" which is true but the ball/flange piece they supply reduces down to 2" and my exhaust is going to be 2.5". So I ordered a 2.5" to 2.5" flange piece which should arrive tomorrow then I can get going on exhaust.

still need to install the transmission controller, plumb the cooler, fill the atlas, attach the drivelines (maybe shorten the front driveshaft)

This morning i bought some 3/8ths hard line and a couple fittings to run hard lines up from the transmission to somewhere on the firewall. The exhaust will be very close to the transmission hoses so I didn't want to run rubber hose all the way to the transmission.
 
OP
OP
DanWheeler

DanWheeler

Bronco Guru
Joined
Nov 8, 2005
Messages
2,549
Loc.
Kirkland, WA
new exhaust in progress

639188870_aRJy5-L.jpg


639188214_gwZ7j-L.jpg


One problem I ran into was the transmission lines pointed straight out to where my exhaust was going to be. When I bent the 3/8ths hard line I couldn't get a tight enough bend to clear the exhaust without kinking the hard line. I bought these 1/4" male NPT to 3/8ths female inverted flare elbows that worked perfectly:
639188494_gpGQN-L.jpg


639188084_pRXkD-L.jpg


639188153_tvsDD-Ti.jpg


639188805_nhW6d-L.jpg


639189362_J8P8R-XL.jpg


This is my first attempt at exhaust work so I'm pretty happy with how its coming along. That entire piece actually slips up into place (just barely) without removing the crossmember.
 
Last edited:
OP
OP
DanWheeler

DanWheeler

Bronco Guru
Joined
Nov 8, 2005
Messages
2,549
Loc.
Kirkland, WA
I'm very happy to report that this project is done and it is:

aaaaawwwwweeeesssssooooommmmmeeeeee.

I will post all the final pics tonight. There are still a few little things to be done like welding together the shortened front drive shaft (or buying a new one) and finishing a tailpipe.

I used the default Baummann controller shift points for the 4R70W which seem to be OK. I did have a problem with the TPS i bought. it's voltage reading at its lowest level was slightly higher than the minimum allowed by the software. I need to call them up and see if there's anything I can do about that. I'm not sure if it really matters because I'm only missing out on throttle position zero. (it idles at throttle position 1)

I also need to wire up some backup lights, an overdrive cancel switch/LED and maybe a switch for an alternate shift table and I'd like to tinker with the lockup converter settings a bit. it would be cool if the 2nd shift table could lock up the converter at above 1MPH so i could flip that switch when going down a hill and get some engine braking. I'm not sure how lock up torque converters work so I'll have to talk to Baumann about that.

I'm planning on doing a writeup - i wrote a letter to webmaster@classicbroncos.com but haven't heard anything back. Anyone know how to contact the webmaster so I can discuss a writeup?
 

Bronchole

Bronco Guru
Joined
Mar 24, 2004
Messages
1,611
Loc.
Chatsworth, Ca (LA)
Dan,

From what I understand you could install a momentary switch and hook it up so that it will enguage the lockup function of the torque converter. I think broncobowsher has it done that way. I kinda like your idea of using the alternate table though, it sounds like a good way to get to the same end and with the 1 MPH lockup speed it should release just befor you are stalling the motor. I wonder if you can put in 0.5 MPH?

Dan
 
OP
OP
DanWheeler

DanWheeler

Bronco Guru
Joined
Nov 8, 2005
Messages
2,549
Loc.
Kirkland, WA
here's some final pics of the exhaust and other stuff:

Version 1:
639188153_tvsDD-S.jpg


Version 2:
646694540_xSZmp-S.jpg


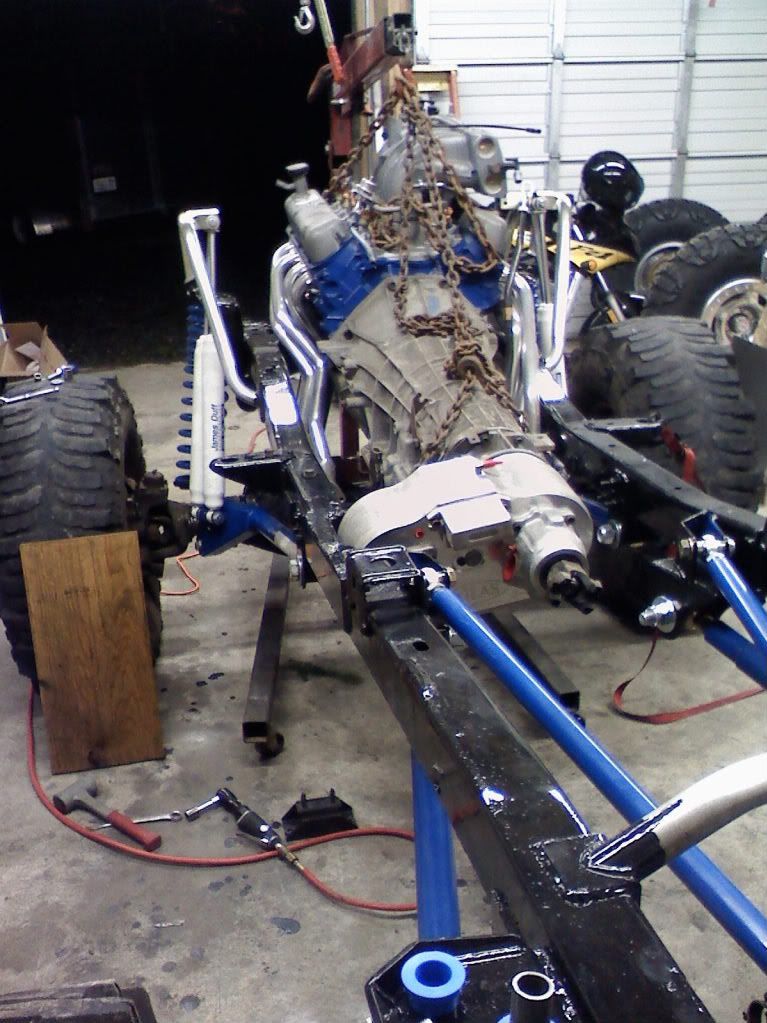
elbow fittings needed to aim transmission hard lines upward so they dont conflict with the headers: (1/4" pipe X 3/8" Female Inverted Flare)
646695354_GwbDv-S.jpg


still need to finish the exhaust but it works OK for now
646696561_HHiGt-S.jpg


646696208_c7GR6-S.jpg


hangers and clamps from summit
646696888_hw5aF-S.jpg


Stock shifters installed through side of tunnel:
637695897_ca3L8-S.jpg


Had to re-weld on some new straight round stock to get everything to fit and still allow the boot and boot ring to fit. Welded the threaded tops back onto the top of my straight round stock pieces:
646697600_TdGME-S.jpg


tunnel covers:
646698029_rEbHV-S.jpg


646698653_fXz6u-S.jpg


computer velcro mounted behind the glove box. I can see the gear indicator LED on the computer through the old dash speaker holes from the drivers seat:
646698304_HKvZL-S.jpg


new radiator I purchased after leaving the transmission on a tranny jack overnight which lost pressure and pushed the engine fan into the old radiator and ripped a hole in it:
646699712_QV8VS-S.jpg


646699374_u8nV6-S.jpg


Explorer transmission dipstick mounts perfectly:
646699027_3B8ZR-S.jpg


headers driver's side above:
646700100_XDKTJ-S.jpg


headers drivers side below:
646700562_aD3wj-S.jpg


crossmember - hope it holds - might need some reinforcing
646700876_sPK2F-S.jpg
 
Top