• Welcome to ClassicBroncos! - You are currently viewing the forums as a GUEST. To take advantage of all the site features, please take a moment to register. It's fast, simple and absolutely free. So please join our community today!
    If you have problems registering or can't log into your account, please contact Admin.

4 link, ORI's, narrowed D60w/only 2.5" lift, 5"+WB stretch, 2" floor lower, P/S....,

OP
OP
nvrstuk

nvrstuk

Contributor
Just a Bronco driver for over 50 yrs!
Joined
Jul 31, 2001
Messages
9,411
Loc.
PNW
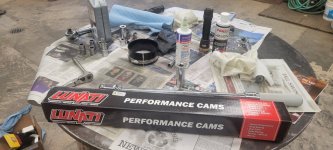
Well, the new Summit adj from 4.120-4.220" dia ring compressor worked well. Never used one of the "adjustable" ones but they didn't have any the correct size for my new pistons. Took a bit of adjusting for the correct diameter but then it worked well.

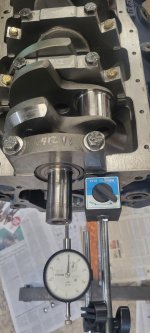
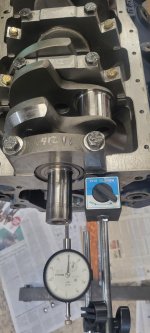
Pistons are in, thrust #'s are double checked, but my old torque wrench died. I pulled it out of my box and it didn't click when rotating the grip which changes the torque setting. I've had people using my tool box the last month so I'll have to ask. ODD that when I pick it up the handle won't rotate and it wouldn't hold a setting. Seems odd it would die w/o being used but ?? Good luck strikes again right? They usually don't die sitting in the Snap On box...

New one is already on it's way as the 2 torque settings I need won't be accurate enough on my small torque wrench or my big one... of course! Will borrow my buddies tomorrow am.
 

Attachments

  • 20230603_123122.jpg
    20230603_123122.jpg
    126.9 KB · Views: 20
  • 20230603_113647.jpg
    20230603_113647.jpg
    131.9 KB · Views: 20
Last edited:
OP
OP
nvrstuk

nvrstuk

Contributor
Just a Bronco driver for over 50 yrs!
Joined
Jul 31, 2001
Messages
9,411
Loc.
PNW
Here's a comparison between a typical piston ring compressor and a slightly adjustable one with a nice fat base so it sits against the block deck squarely.
Took several times to get the diameter correct but once it's dialed in it worked like it should.

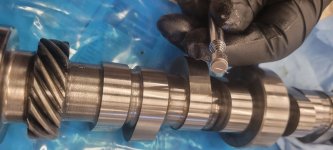
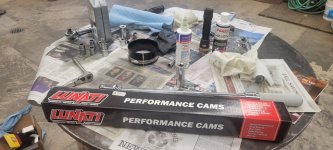
I was pretty much done doing a visual on the cam and then I saw this stuck on the side of 1of the lobes!!

Not good. :(

Can't be too clean
 

Attachments

  • 20230604_115343.jpg
    20230604_115343.jpg
    100.1 KB · Views: 45
  • 20230604_113037.jpg
    20230604_113037.jpg
    154.8 KB · Views: 43
  • 20230604_115153.jpg
    20230604_115153.jpg
    105.1 KB · Views: 45
Last edited:

Speedrdr

Contributor
OLD night owl
Joined
Nov 27, 2017
Messages
1,662
Loc.
Paris, MS
I’m assuming that’s a metal shaving since it looks like it’s stuck to a magnet. Any idea where it came from? Maybe it’s just a random piece that didn’t come from the camshaft. Fingers crossed.

Randy
 
OP
OP
nvrstuk

nvrstuk

Contributor
Just a Bronco driver for over 50 yrs!
Joined
Jul 31, 2001
Messages
9,411
Loc.
PNW
Oh it came from the camshaft because when I took it out of the box that was stuck on the side! I had been wiping the bearing surfaces and the cam lobe surfaces and notice it.
 
OP
OP
nvrstuk

nvrstuk

Contributor
Just a Bronco driver for over 50 yrs!
Joined
Jul 31, 2001
Messages
9,411
Loc.
PNW
It was just a loose sliver from their shop or something. Didn't come off of mine.
 
OP
OP
nvrstuk

nvrstuk

Contributor
Just a Bronco driver for over 50 yrs!
Joined
Jul 31, 2001
Messages
9,411
Loc.
PNW
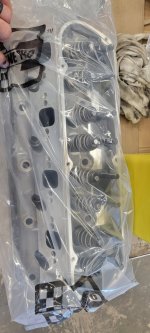
Had to shave more off the Zheads than I wanted but they have to be flat. I really wanted to keep compression as low as possible but I am such a believer in quench that there's no way I'd stuff in a thicker head gasket.

Took .010" to even them up and to eliminate the fire ring impression in the alum. Steel ring in the gasket and 100# of torque on the ARP bolts and you get a small impression. Slight twist in the head also so I had to shave them some.

I'll bet once I get a couple seals exchanged for the correct ones tomorrow and about 1/2 a day I could have this hanging by a chain!!! :)

Still have a firewall brace or two to install/weld in and I received my longer shift cable so I can connect the new shift lever and bracket to my Winters in my console.

Couple eye candy pics!
 

Attachments

  • 20230604_115153.jpg
    20230604_115153.jpg
    105.1 KB · Views: 33
  • 20230605_072325.jpg
    20230605_072325.jpg
    92.6 KB · Views: 32
  • 20230605_185922.jpg
    20230605_185922.jpg
    119.8 KB · Views: 36
  • 20230606_180846.jpg
    20230606_180846.jpg
    137.2 KB · Views: 34
OP
OP
nvrstuk

nvrstuk

Contributor
Just a Bronco driver for over 50 yrs!
Joined
Jul 31, 2001
Messages
9,411
Loc.
PNW
Here's some numbers- I am a numbers guy. lol

4.155" bore
4.25" stroke
.041" compr gasket
30cc dish
.009" in the hole
.0025" piston skirt to cyl wall (Mahle min recommendation)
63cc combustion chamber
took .010" out of the combustion chamber to flatten the heads

This took me to appr. 10.24CR

See #1 piston at TDC and feeler gauges don't lie!

Starting to look like something recognizable again... beware... rant again-
thanks Ford Perf for forcing me to lose 9 months of driving my Bronco with my buddies -forever lost and "getting" to spend approximately $2,000 to fix your screw-up!!!, even after you tried to blame me for "improperly warming" it up and then told me my block would be shipped to me the next day! No love lost and now I'm looking for an LS for my next Ford project.

(Guess I'm still PO'd at Ford Perf) lol
 

Attachments

  • 20230605_203913.mp4
    57 MB
  • 20230605_080736.jpg
    20230605_080736.jpg
    129 KB · Views: 30
  • 20230605_081214.jpg
    20230605_081214.jpg
    132.5 KB · Views: 28
  • 20230604_113037.jpg
    20230604_113037.jpg
    154.8 KB · Views: 27
  • 20230603_123122.jpg
    20230603_123122.jpg
    126.9 KB · Views: 29
  • 20230606_202701.jpg
    20230606_202701.jpg
    180.9 KB · Views: 32
Last edited:
OP
OP
nvrstuk

nvrstuk

Contributor
Just a Bronco driver for over 50 yrs!
Joined
Jul 31, 2001
Messages
9,411
Loc.
PNW
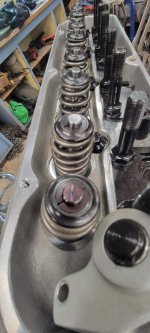
Checking pushrod length today as I am/was super worried about having to buy shorter pushrods since I had to shave the heads but the pattern on int & exh look just fine.

Guess I'll start adjusting valves. :)
 

Attachments

  • 20230607_105236.jpg
    20230607_105236.jpg
    150.4 KB · Views: 32
  • 20230607_124251.jpg
    20230607_124251.jpg
    101.3 KB · Views: 32
  • 20230607_125507.jpg
    20230607_125507.jpg
    126.7 KB · Views: 35

ntsqd

heratic car camper
Joined
Jan 30, 2005
Messages
3,883
Loc.
Upper SoKA
Just in case, one of the old school best in push-rods is just down the road from you in Bend. Oooh, they moved, they're now in Redmond, OR.


I should go to work for them. Then I would have to move.
 

73azbronco

Contributor
Bronco Guru
Joined
Nov 11, 2007
Messages
8,218
Do you have any dislike for Ford Performance camshafts? I’m planning to buy one as soon as it becomes available.

I may buy a set of Ford Performance heads as well.
Alphabet camshafts are mass produced designed to get you to buy Ford. Go aftermarket.
 
OP
OP
nvrstuk

nvrstuk

Contributor
Just a Bronco driver for over 50 yrs!
Joined
Jul 31, 2001
Messages
9,411
Loc.
PNW
Longest slowest build on an engine in my life. Not sharing all that's going on here but there is a lot so the Bronco is a low priority and it's a good distraction.

Cleaning is not my forte... at least things like exterior paint, interior like seats, carpet etc but the inside of an engine? SPOTLESS :)

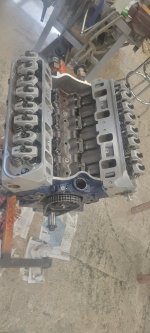
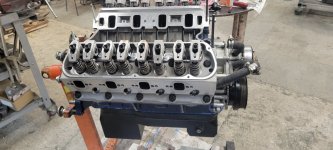
Anyway, the heads are on, clearance btw valve reliefs and pistons with more quench .049" than I want but it's not bad. Safe for a short skirted piston and safe is where I'm at with this build.

The 3rd pic (close up with partial bolt head) shows some of the block clearancing needed for the large journals and H beam rod ends. Made a couple oil pump gaskets. Put the 400M oil pump drive shaft in so it fits Lar's adapter that spaces the cam synchronizer (Windstar) the correct height.

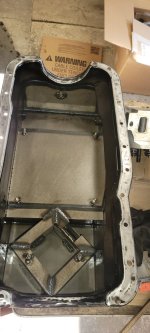
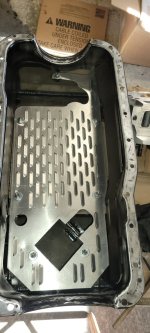
Buttoned up the ridiculously over-built windage tray and gated oil pan but it does keep the oil around the pickup tube.

Poured 8qts of 30W break-in oil over the pushrods, springs, etc.

Used really sticky tape to hold my 1/4" drive socket on the oil pump shaft :) Cranked it for a bit and it felt really good after 8 months to hear oil sloshing around the lifters and rockers.

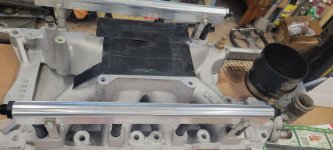
I ported the SuperVic to the Z heads a little and I had to order thinner intake gaskets to set the intake at the right height. They are coming tomorrrow, new plugs and new header gaskets (forgot all these!)- lot's going on.

Anyway. Have some engine compartment stuff to do (still- I know right!!) before I set it in but it won't be long.

Need to call my tuner to get scheduled. I can send him some data logs after everything is running and checks out ok. New cam so I expect idle to be a bit off. Not too worried about AFR for data logging as I can watch my wide band O2 to keep me safe before the first tune.


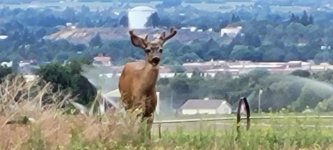
Thought the pics of 2 bucks would be fun. The watertower in the background is 4 1/2mi away. They were both about 100' away.
 

Attachments

  • 20230608_170017.jpg
    20230608_170017.jpg
    146.6 KB · Views: 26
  • 20230608_175723.jpg
    20230608_175723.jpg
    64.6 KB · Views: 36
  • 20230609_133618.jpg
    20230609_133618.jpg
    91.9 KB · Views: 35
  • 20230609_153150.jpg
    20230609_153150.jpg
    148.8 KB · Views: 33
  • 20230609_191250.jpg
    20230609_191250.jpg
    150.8 KB · Views: 35
  • 20230609_191448.jpg
    20230609_191448.jpg
    90.6 KB · Views: 34
  • 20230609_191451.jpg
    20230609_191451.jpg
    93.7 KB · Views: 32
  • 20230609_204334.mp4
    15.7 MB
Last edited:
OP
OP
nvrstuk

nvrstuk

Contributor
Just a Bronco driver for over 50 yrs!
Joined
Jul 31, 2001
Messages
9,411
Loc.
PNW
Almost had a "what, ... again" moment today.

I've turned the engine over a half dozen times setting valves, bolted the timing chain cover on, oil pump, etc and after priming last night I thought I'd crank the engine over 2x today while priming then set it on TDC and move on.

So after picking up my gaskets this morning. I primed and rotated the crank and it went clunk. :(

Rotated back the other direction and clunk. Was fine before I primed it. Thinking it was valve interfernce after the lifters primed was all I could think of- only thing that had changed that could think of.

Well after draining the oil, pulling the pan I could see where the problem was. Bolting on the oil pump and the pickup tube and the rod cap bolt barely touched it- like barely.

I loosened the main cap stud that holds the pickup tube and barely moving it enough clear the rod bolt by .020" I could see that it stressed the connection flange so I loosened the oil pump bolts and pushed the pump (couldn't feel it move) and retightened the bolts. That few thouandths allowed the pickup tube to clear the rod bolt by about .030" so GOLD!!! What a pain but that was it.
 

Attachments

  • 20230610_175125.jpg
    20230610_175125.jpg
    120.9 KB · Views: 28
  • 20230610_175823.mp4
    26.9 MB
  • 20230610_175846.mp4
    36.7 MB
  • 20230610_180924.mp4
    34.5 MB
  • 20230610_180947.jpg
    20230610_180947.jpg
    121.1 KB · Views: 29

Yeller

Contributor
Bronco Guru
Joined
Mar 27, 2012
Messages
6,850
Loc.
Rogers County Oklahoma
At least you found it before start up, that would have been real exciting and not in a good way.

When I built my buggy I used an engine that I had, it was known tired but ran fine, had good oil pressure, ect. Got it finished and it had a horrible rod knock upon start up, I was sick. Oil pressure was still good, even tried another gauge. While the engine was sitting on the chassis jig I had managed to get enough weight on the pan to collapse it a small imperceptible amount. Still unknown what was wrong really wrong you could feel the knock in the oil pan, I took a gamble and smacked the side of the pan with a mallet, the knock stopped instantly😂

ran that motor until I had to start it with ether to get it to light and then keep it wound up until it was making a little heat. It was down to a low of 50 and a high of 55 pounds of compression🤣🤣🤣 figured I got all the good out of it.
 
Top